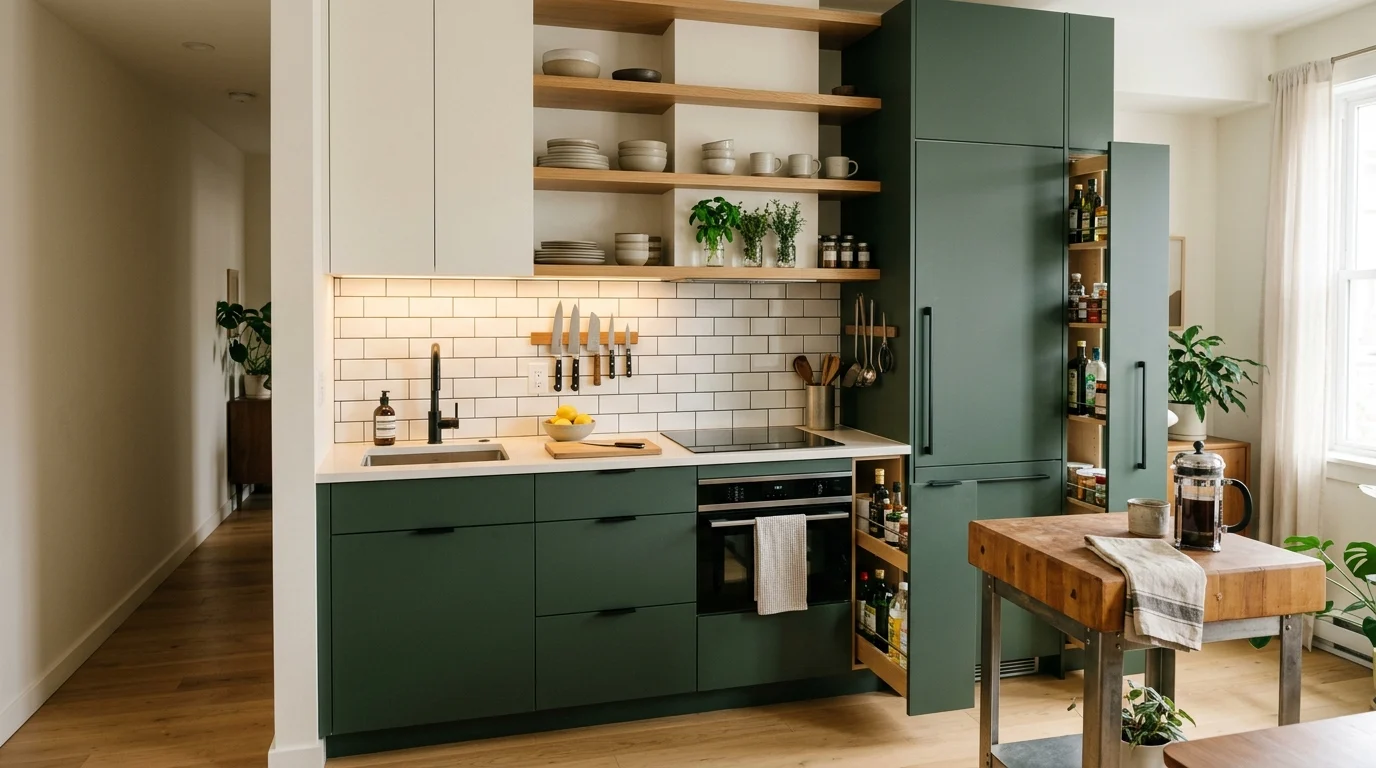
When I was apartment hunting years ago, I toured a place with what the listing generously called a “galley kitchen” that, in reality, measured about six feet by five feet, barely enough room to open the oven and the fridge door at the same time. I almost passed on the apartment entirely because of that kitchen, but the rest of the space was exactly what I needed, so I took the leap and spent the next few years figuring out how to make that tiny kitchen actually work, and eventually, how to make it genuinely nice to look at and cook in.
That experience taught me something I didn’t expect: a small kitchen isn’t automatically a compromise. Some of the smartest, most visually striking kitchens I’ve seen since then have been tiny ones, precisely because every single decision in a small space has to be intentional. There’s no room for wasted square footage or thoughtless choices the way there sometimes is in a larger kitchen.
Here are 17 mini kitchen ideas I’ve tested myself, borrowed from friends with similarly small spaces, or picked up through a lot of trial and error, all proving that a small kitchen can be genuinely stunning rather than just functional.
1. Go Bold With a Single Statement Color
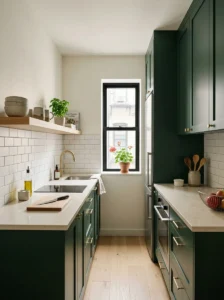
In my tiny apartment kitchen, I was initially scared of committing to any strong color, worried it would make the small space feel even more closed in. I eventually painted my cabinets a deep forest green, and the effect was the opposite of what I feared, it gave the kitchen a sense of personality and intention that the previous plain white cabinets never had.
A bold, saturated color in a small kitchen reads as confident rather than overwhelming, largely because there’s simply less surface area for the color to become visually exhausting the way it might in a larger room. I kept my walls and countertops light and neutral, letting the cabinet color be the single dominant statement rather than layering multiple bold choices.
If committing to cabinet paint feels risky, even a bold color on just a small kitchen island, a range hood, or the interior of open shelving can introduce the same striking effect on a smaller, lower-commitment scale.
2. Maximize Vertical Storage With Open Shelving
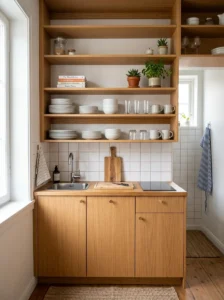
Once I accepted that my kitchen simply didn’t have room for full-height upper cabinets on every wall, I replaced one run of cabinets with open wood shelving instead, which visually opened up the space while still providing genuine storage.
Open shelves also encouraged me to actually edit down my dish and glassware collection to only what I use regularly, since anything visible needed to look at least somewhat intentional rather than like overflow storage. I grouped my everyday dishes in neat stacks and added a couple of plants and a small stack of cookbooks to break up the purely functional items.
I’d recommend, based on my own trial and error, keeping open shelving to just one or two walls rather than replacing all your storage this way, since full cabinets still matter for hiding less attractive everyday items like cleaning supplies or bulk pantry goods.
3. Use a Rolling Cart as a Mobile Island
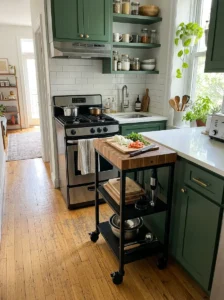
My kitchen was too small for a fixed island, but I still wanted extra counter space and storage. A simple rolling kitchen cart solved this perfectly, giving me additional prep surface when I needed it and the ability to tuck it into a corner or even a nearby hallway when I didn’t.
I chose a cart with a butcher block top and a lower shelf, which held my cutting boards and a couple of frequently used small appliances. Being able to wheel it right next to my stove while cooking, then push it out of the main walking path afterward, made a genuine daily difference in how workable the kitchen felt.
This is one of the lowest-cost, highest-impact changes I made in that apartment, and I’ve since recommended it to several friends dealing with similarly tight kitchen layouts.
4. Choose Handle-less or Push-to-Open Cabinets
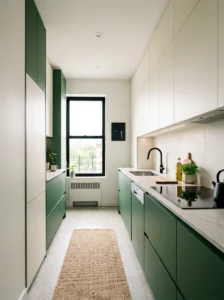
Protruding cabinet handles and knobs in a tight kitchen can genuinely eat into usable walking space, something I didn’t fully appreciate until a friend with an even smaller kitchen than mine showed me her push-to-open cabinet system, which eliminated hardware entirely.
Without handles catching on clothing or narrowing the already tight walkway, her kitchen felt noticeably more spacious despite having the same actual square footage as before the cabinet hardware was removed. The clean, handle-less fronts also gave her kitchen a sleeker, more modern look overall.
If replacing your cabinet doors and hardware system isn’t practical, simply switching to slim, recessed pull hardware rather than bulky knobs can achieve a similar, smaller-scale version of this space-saving benefit.
5. Add a Fold-Down Table for Extra Surface Space
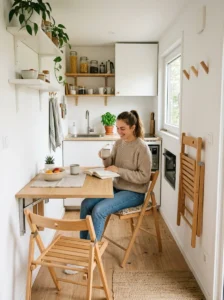
Without room for a full dining table, I installed a simple fold-down table attached to my kitchen wall, which stayed flat against the wall most of the day and folded out to provide extra prep or eating space when needed.
This was one of the more involved projects I tackled in that apartment, requiring proper wall anchoring to support the table’s weight when extended, but it solved two problems at once, extra counter space for meal prep and an actual place to sit and eat that my kitchen otherwise couldn’t accommodate.
I paired it with two simple folding chairs that hung on wall hooks nearby when not in use, keeping the whole eating area completely out of the way during the rest of the day.
6. Use Under-Cabinet Lighting to Add Depth
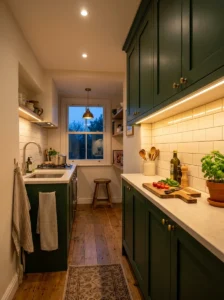
My original kitchen had a single harsh overhead light, which made the tight space feel even more cramped and utilitarian. Adding a simple strip of under-cabinet LED lighting made a bigger difference than I expected, both functionally, for actually seeing what I was chopping, and visually, adding a warm glow that made the small kitchen feel more inviting in the evening.
The lighting also created a subtle sense of depth, illuminating the countertop and backsplash in a way that made the vertical space feel taller and more dimensional rather than flat and boxy under the single overhead light.
This is a relatively inexpensive, weekend-project-level upgrade, and it remains one of the changes I’d recommend first to anyone working with a similarly small, dark kitchen.
7. Choose a Slim, Apartment-Sized Range
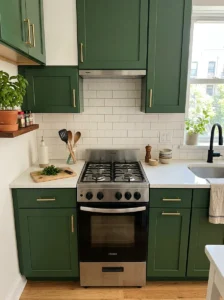
Standard 30-inch ranges simply didn’t fit comfortably in my kitchen’s layout without eating into counter space I desperately needed elsewhere. I eventually replaced my range with a slimmer 24-inch model designed specifically for apartment-sized kitchens, which freed up nearly a full extra foot of counter space beside the stove.
This did mean a slightly smaller oven cavity and fewer burners, four instead of the standard five, which took a bit of adjustment in how I cooked larger meals. But the tradeoff in daily usability, having actual counter space to work with beside the stove, was worth the compromise for how I actually cook day to day.
For anyone with a similarly tight kitchen, measuring your actual available wall space before assuming a standard-sized range is necessary is worth doing early in any small kitchen renovation.
8. Reflect Light With a Mirrored or Glossy Backsplash
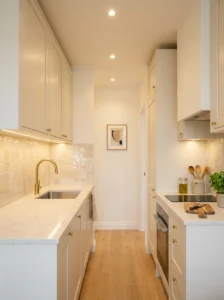
A friend with an even smaller, windowless kitchen than mine used a glossy, light-reflective tile backsplash specifically to bounce available light around the room, since natural light wasn’t an option in her particular space.
The reflective surface made a genuine visual difference, her kitchen felt brighter and less closed-in despite having no windows at all. She paired the glossy tile with light-colored cabinets and countertops, maximizing the light-reflecting effect throughout the whole space rather than just at the backsplash itself.
This is a strategy I’d specifically recommend for kitchens without much natural light, since a matte or dark backsplash in that same windowless space would likely make the room feel considerably more cramped and dim by comparison.
9. Install a Narrow Pull-Out Pantry
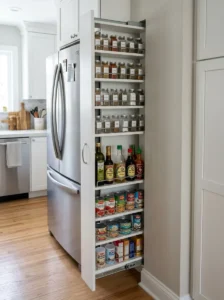
One of the smartest small-kitchen solutions I’ve seen was a friend’s narrow pull-out pantry cabinet, installed in a gap of wall space barely six inches wide between her fridge and the adjacent wall, a space that would have otherwise been completely wasted.
The pull-out pantry held spices, oils, and canned goods on shallow shelves that slid out fully for easy access, turning what was previously dead space into genuinely useful storage. This kind of narrow-gap solution requires some careful measuring and often a custom or semi-custom cabinet order, but the payoff in a truly space-starved kitchen can be significant.
I’d recommend measuring any narrow gaps in your own kitchen layout carefully, since even six to ten inches of unused width can accommodate a slim pull-out storage solution that adds real function without requiring any additional floor footprint.
10. Choose Multi-Functional Small Appliances
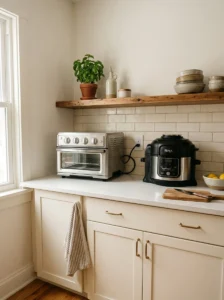
In my small kitchen, counter space for appliances was almost nonexistent, so I became fairly selective about which appliances actually earned a permanent spot on my counter. I replaced a separate toaster and toaster oven with a single combination unit, and later replaced a rice cooker and slow cooker with one multi-function electric pressure cooker that handled both tasks.
This consolidation freed up significant counter space that had previously been occupied by multiple single-purpose appliances, several of which I wasn’t using especially often on their own. I kept only my most frequently used equipment on the actual counter, storing anything used less than weekly in a cabinet instead.
This is a genuinely simple, low-cost strategy, essentially just an honest audit of what you actually use regularly versus what’s simply taking up valuable counter space out of habit.
11. Extend Storage With a Pegboard Wall
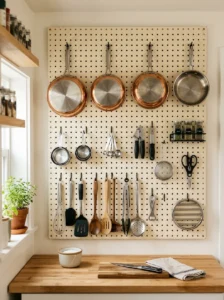
A friend converted a blank section of wall in her tiny kitchen into a fully functional pegboard, hanging pots, pans, and cooking utensils that would have otherwise needed cabinet space. The pegboard turned what was previously unused vertical wall space into genuine, easily accessible storage.
Beyond the functional benefit, the arrangement of hanging copper-bottomed pots and neatly organized utensils became a genuine visual feature in her kitchen, adding warmth and personality rather than looking purely utilitarian. She organized items by size and frequency of use, keeping her most-reached-for tools at eye level and less common items higher up.
This is a particularly good solution for kitchens with limited cabinet space but at least one open wall section, converting what would otherwise be a blank, unused surface into both storage and a decorative focal point.
12. Use a Fold-Away Cutting Board Over the Sink
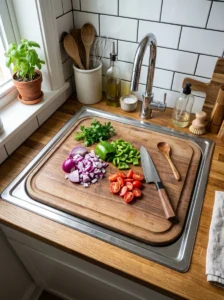
A clever trick I picked up from a friend with an incredibly tight kitchen involved a custom cutting board sized to fit directly over her sink basin, effectively creating temporary extra counter space whenever she needed to prep food, without permanently sacrificing any actual counter footprint.
This solution works especially well for kitchens where the sink sits along the same counter run as the main prep area, since it essentially borrows the sink’s footprint for food prep tasks and then reverts back to a functional sink the rest of the time.
I’d recommend measuring your specific sink basin dimensions carefully before purchasing or building a cutting board for this purpose, since an ill-fitting board can wobble or shift during use, which becomes a genuine safety concern when working with sharp knives.
13. Choose Stackable or Nesting Cookware
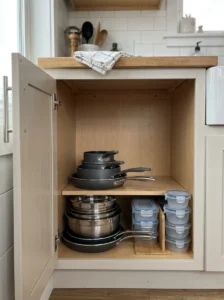
My original cookware collection, inherited piece by piece over the years, took up an entire lower cabinet on its own, largely because none of the pots and pans nested together efficiently. Replacing it with a matched cookware set specifically designed to stack and nest compactly freed up nearly half that cabinet’s storage space.
This same principle applies to mixing bowls, food storage containers, and baking sheets, choosing sets specifically designed for compact nested storage rather than accumulating mismatched pieces over time that don’t stack efficiently together.
This isn’t a change most people make all at once, but I’d recommend keeping it in mind gradually, as you replace worn-out cookware or containers over time, prioritizing pieces that nest well with what you already own rather than choosing purely based on individual item design.
14. Add a Small Bar Cart for Extra Storage and Style
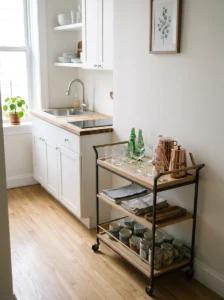
Without room for a full pantry or buffet-style storage, I added a narrow bar cart along one wall of my kitchen, which held my everyday drinking glasses, a few bottles, and some small serving pieces I used regularly for entertaining.
Beyond its storage function, the cart added a genuine decorative element to the kitchen, filling what had been an awkward, narrow strip of empty wall with something both useful and visually appealing. I chose a cart with a slim profile specifically to avoid narrowing my already tight walking path any further than necessary.
This kind of narrow, mobile storage solution works particularly well in kitchens with one strip of otherwise unused wall space too narrow for standard cabinetry but wide enough to accommodate a slim cart.
15. Install a Fold-Up Drying Rack
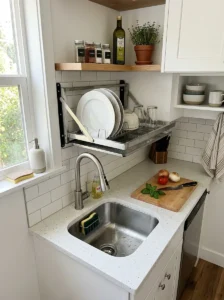
Dish drying racks permanently occupying counter space were a constant frustration in my small kitchen until I switched to a fold-up, over-the-sink drying rack that could hang flat against the wall or fold away entirely when not actively drying dishes.
This reclaimed a meaningful strip of counter space that had previously been permanently dedicated to a standard freestanding drying rack, space that I could then use for actual food prep instead. The fold-away design meant I only needed to deal with visible drying dishes during the actual drying process, rather than having a rack as a permanent counter fixture.
For anyone with a similarly tight kitchen, this is a small, inexpensive swap that addresses one of the most common sources of small-kitchen counter clutter.
16. Use Glass-Front Cabinets to Create Visual Depth
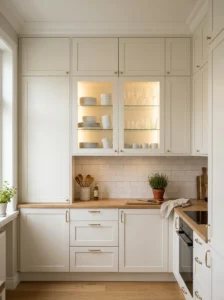
A friend with a particularly cramped kitchen replaced a couple of her solid upper cabinet doors with glass-front versions, which created a sense of depth and openness even though the cabinets’ actual storage capacity remained identical.
The glass fronts let a bit of the cabinet’s interior color and dishware show through, adding visual interest and breaking up what had previously been a solid wall of matching cabinet doors. She was careful to keep the contents behind the glass doors reasonably tidy and cohesive, since messy or mismatched dishware becomes far more visually distracting behind glass than behind a solid door.
This works particularly well combined with the open shelving concept mentioned earlier, using glass-front cabinets for items you want protected from dust but still want visually accessible, reserving fully open shelving for your most frequently used, presentable pieces.
17. Commit to a Cohesive, Uncluttered Color Palette
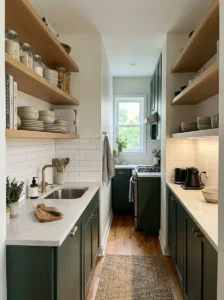
Across every small kitchen project I’ve worked on, my own and others’, the single most consistent lesson has been that visual clutter, mismatched colors, competing patterns, too many different materials, makes a small kitchen feel considerably smaller than a genuinely cohesive, restrained palette does, even when the actual furniture and storage choices are similar.
In my own kitchen, once I settled on my forest green cabinets, light oak open shelving, and simple white subway tile backsplash, and made sure every new purchase, dish towels, small appliances, decorative items, stayed within that same restrained color story, the kitchen felt considerably calmer and more spacious than it had during the earlier phase when I was mixing colors and styles more freely.
This is ultimately the most important, and least expensive, lesson from this entire list: a small kitchen doesn’t need more stuff or more clever storage tricks to feel stunning, it needs restraint and a clear, consistent visual plan that ties every individual choice back to a cohesive whole.
Frequently Asked Questions
What’s the biggest mistake people make in small kitchens? Based on my own experience, it’s usually accumulating too many single-purpose items, extra appliances, mismatched cookware, decorative clutter, rather than being selective about what genuinely earns limited counter and storage space.
Do small kitchens need to stick to light colors to feel bigger? Not necessarily. Bold colors can work beautifully in small kitchens specifically because there’s less surface area for the color to feel overwhelming, as long as the rest of the palette stays restrained and cohesive.
Is it worth investing in custom storage solutions for a small kitchen? For genuinely awkward or narrow spaces, like slim pull-out pantries in gap spaces, custom solutions often provide the best return on investment, since off-the-shelf options rarely fit non-standard gaps efficiently.
Can a small kitchen still accommodate an island? A fixed island usually isn’t practical in very tight kitchens, but a mobile rolling cart can provide similar extra counter space and storage benefits without permanently committing floor space.
Final Thoughts
That first tiny apartment kitchen, which I almost walked away from years ago, ended up teaching me more about smart, intentional design than any larger kitchen I’ve worked with since. The core lesson across all seventeen of these ideas is that a small kitchen’s limitations actually force a level of thoughtfulness that’s easy to skip in a larger space, every single choice has to earn its place. Approach your own small kitchen with that same intentionality, and it can absolutely become one of the most stunning, functional rooms in your home, regardless of its actual square footage.