When my sister decided to knock down the wall between her kitchen and living room a few years ago, I got roped into helping with the planning almost by accident, one conversation about paint colors somehow turned into weekends of measuring, researching, and eventually helping her furnish the newly combined space. What started as a small favor turned into a genuine crash course in open-plan design, and by the time her renovation was finished, I understood far more about the specific challenges of these combined spaces than I ever expected to.
The biggest lesson from that whole process was that open-plan living isn’t simply about removing a wall. Without that physical barrier, a lot of decisions that used to be made separately for each room, flooring, lighting, furniture placement, suddenly need to work together cohesively, or the combined space ends up feeling disjointed rather than genuinely open and flowing. I made a few mistakes helping plan her space, and I’ve since applied those lessons more successfully in a couple of other projects, including eventually redoing my own home’s layout to better connect my kitchen and living areas.
Here are 15 ideas for creating a genuinely seamless, well-planned open-concept kitchen, dining, and living space, based on real projects rather than just how these spaces look in photos.
1. Choose One Consistent Flooring Material Throughout
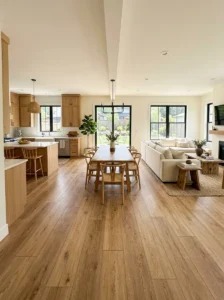
One of the first and most important decisions in my sister’s renovation was choosing a single flooring material to run continuously through the newly combined kitchen, dining, and living areas, rather than transitioning between different materials at the old wall’s former location. This single decision did more to make the space feel genuinely unified than almost anything else we did.
We chose a wide-plank luxury vinyl in a warm oak tone, which provided the durability and water resistance needed for the kitchen area while still looking appropriate and cohesive extending into the more traditionally “living room” dining and seating areas. Transitioning between different flooring materials, tile in the kitchen and carpet in the living room, for example, tends to visually and physically break up an open-plan space, undermining the whole point of removing the wall in the first place.
For anyone renovating an already-open space rather than combining rooms through demolition, auditing your existing flooring situation and considering a full, consistent replacement, even if it means replacing perfectly functional existing flooring in one section, is often worth the investment for how much it improves the overall sense of flow.
2. Use an Island as a Natural Divider
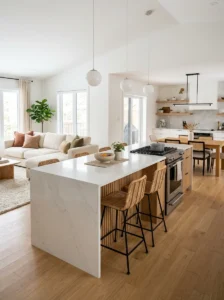
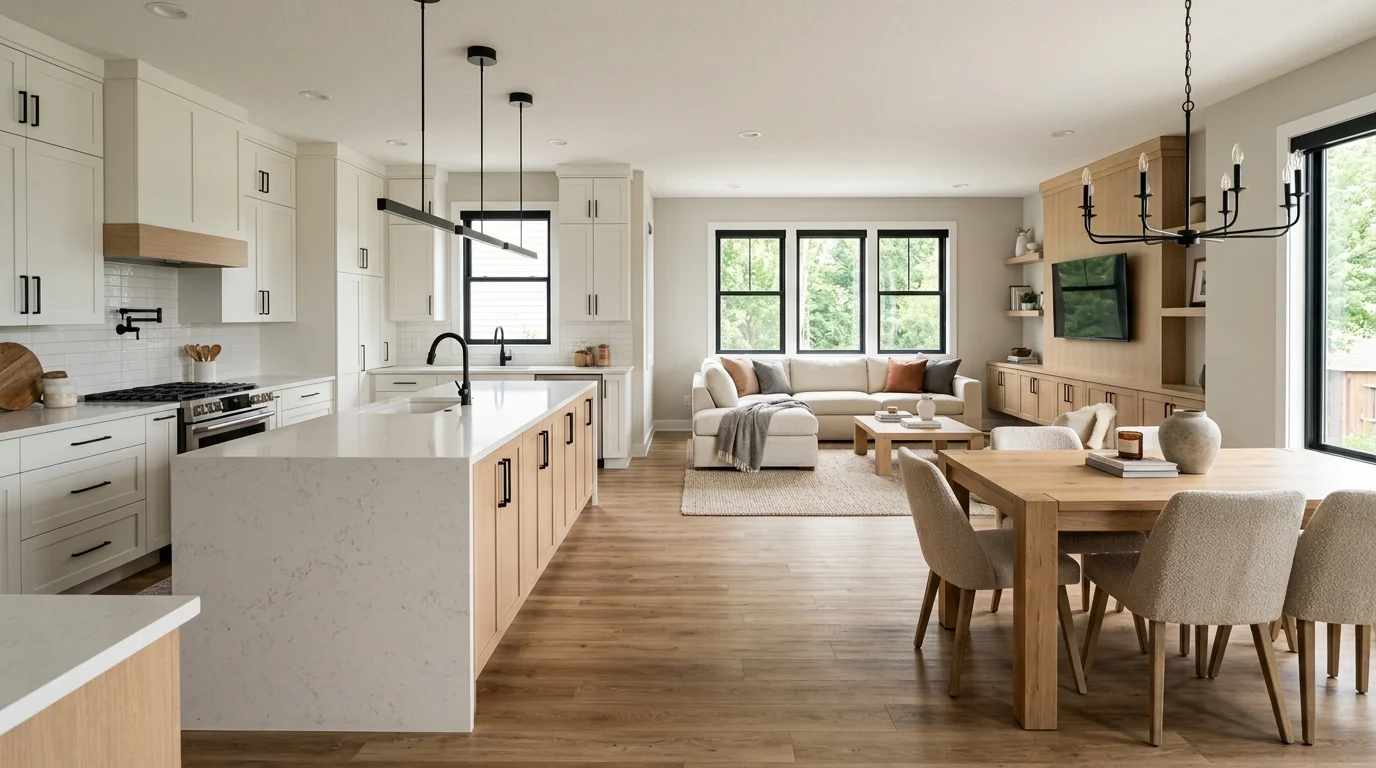
Rather than relying on furniture placement alone to separate the kitchen area from the dining and living space, my sister’s island, positioned along the boundary where her old wall used to stand, became a natural, functional divider between the cooking zone and the rest of the open room. This gave the space a clear organizational logic without requiring any actual physical barrier.
We extended one end of her island slightly to include a raised bar seating area, facing toward the living room side, which further reinforced this transitional, divider function while also providing casual seating that bridges the kitchen and living spaces. The island’s height and orientation matter here, positioning it perpendicular to the main sightline between the kitchen and living areas helps it read as a deliberate boundary rather than simply another piece of furniture floating in the room.
This approach works particularly well for anyone with a kitchen and living space combined into a single large room, providing organizational structure without needing walls, partial walls, or other more permanent architectural dividers.
3. Coordinate a Single Color Palette Across All Zones
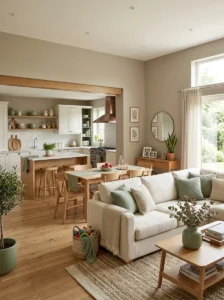
Before my sister’s renovation, her kitchen and living room had been painted in entirely different colors, chosen independently over the years without any thought to how they’d relate once the dividing wall came down. Coordinating a single, cohesive color palette across the entire newly combined space became essential once that wall was gone.
We settled on a warm, neutral base, soft greige walls throughout both zones, with her kitchen cabinets in a complementary warm white and her living room furniture and textiles pulling from the same overall neutral family with a single shared accent color, a muted sage green, appearing in both her kitchen’s open shelving styling and her living room’s throw pillows.
This kind of coordinated palette doesn’t mean every element needs to match exactly, but choosing colors that clearly belong to the same overall family, rather than colors that were selected independently for what used to be separate rooms, makes an enormous difference in how unified the combined space actually feels.
4. Vary Ceiling Height or Detail to Define Zones
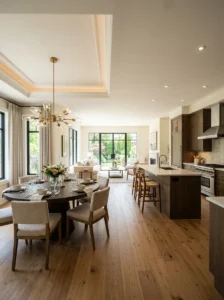
While flooring consistency helps unify an open-plan space, some visual distinction between the different functional zones, kitchen, dining, living, still helps the space feel organized rather than like one undifferentiated room. My sister’s contractor suggested adding a slightly recessed ceiling detail, essentially a shallow tray ceiling, above her dining table specifically, which subtly defined that zone without requiring any wall or partition.
This kind of architectural detail provides zone definition through the ceiling plane rather than the floor or walls, which keeps the overall openness of the space intact while still giving each functional area, cooking, dining, relaxing, a sense of its own defined space within the larger room.
For anyone not planning significant construction changes, even varying ceiling light fixtures between zones, a statement chandelier over the dining table distinct from recessed lighting in the kitchen and living areas, can achieve some of this same zone-defining effect without any structural changes.
5. Use Furniture Placement to Create Distinct Living Areas
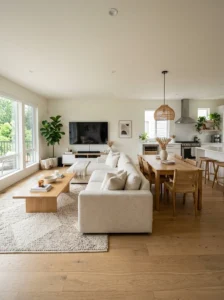
Within the living room portion of my sister’s open-plan space, we were careful to arrange her sofa and chairs to clearly define a distinct seating area, rather than letting the furniture simply float without any clear organizational logic relative to the rest of the room. We positioned her sofa with its back facing partially toward the kitchen and dining areas, using it almost as a soft boundary similar to how her kitchen island functioned on the opposite side of the room.
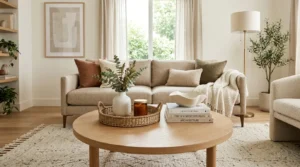
This kind of intentional furniture placement, using the backs and orientations of major furniture pieces to imply zone boundaries, helps an open floor plan feel organized and purposeful rather than like one large, undefined space where furniture happens to be scattered. A rug specifically sized to her seating area further reinforced this zone definition, anchoring the living room furniture within its own defined footprint despite the lack of any actual wall.
This principle applies regardless of the specific furniture pieces involved, the key is using orientation and placement deliberately to communicate each zone’s boundaries and function, rather than arranging furniture purely based on where it happens to fit.
6. Choose a Statement Light Fixture to Anchor the Dining Area
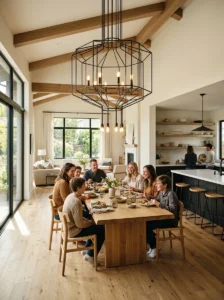
In an open floor plan without a distinct dining room, the dining table itself needs a clear visual anchor to establish its own identity within the broader open space. My sister chose a substantial pendant light fixture positioned directly above her dining table, which became the primary visual signal marking that specific zone’s function and location within the larger combined room.
This fixture needed to be substantial enough to actually read as a statement piece from across the open room, we initially considered a smaller pendant that, once installed, looked somewhat lost and undersized relative to the table and surrounding open space. Sizing up to a larger, more substantial fixture solved this problem and gave the dining zone the presence needed to stand out clearly within the open layout.
This principle, using a distinct, substantial light fixture to anchor and define a specific zone, works well for defining a reading nook or other functional area within an open living space too, not just a dining area specifically.
7. Keep Sightlines Clear Between Zones
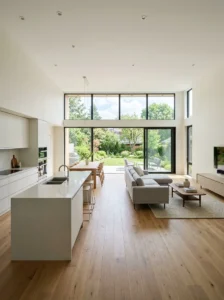
One genuine mistake I made early in helping plan my sister’s space was suggesting a tall bookshelf positioned between her dining and living areas, which, once placed, blocked sightlines and made the space feel more divided than the open floor plan was actually intended to feel. We removed it and replaced it with a much lower console table instead, which restored the open sightlines that make an open-plan space actually feel open.
This is a genuine consideration worth planning for carefully, any furniture piece taller than roughly waist height, positioned between different functional zones within an open floor plan, risks recreating the same visual barrier that removing an actual wall was meant to eliminate. Lower furniture, consoles, low bookshelves, ottomans, maintains those clear sightlines while still providing functional storage or surface space between zones.
I’d recommend, when planning furniture for any open-plan space, specifically checking sightlines from each zone’s primary seating or working position toward the other zones, standing at the stove, sitting at the dining table, sitting on the sofa, to ensure no furniture piece inadvertently blocks the visual connection between spaces.
8. Coordinate Cabinetry and Furniture Materials
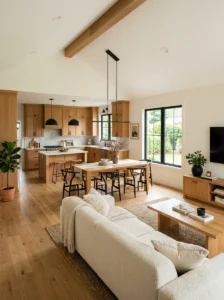
Beyond color palette coordination, we made sure my sister’s kitchen cabinetry material and finish related sensibly to her living room furniture choices, both featuring a similar warm wood tone, rather than the kitchen leaning toward one wood species and finish while the living room furniture used an entirely different, competing wood tone.
This material coordination extends the same principle used for color palette planning into the actual furniture and cabinetry materials themselves, ensuring that even though the kitchen cabinets and living room furniture serve entirely different functions, they still feel like they genuinely belong within the same overall room rather than looking like they were selected for two completely separate spaces.
For anyone renovating just one portion of an already-open space, kitchen cabinets specifically, for example, while keeping existing living room furniture, checking that new material choices reasonably coordinate with what’s already established in the adjoining zone is worth the extra consideration before finalizing selections.
9. Manage Kitchen Noise and Views From the Living Area
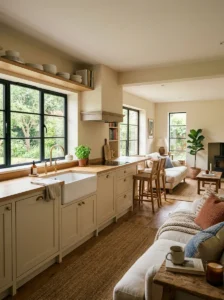
A practical consideration that’s easy to overlook until you’re actually living with an open floor plan is how much kitchen activity, noise, sightlines into a potentially messy sink or stovetop, becomes visible and audible from the living and dining areas once the dividing wall is gone. My sister specifically prioritized a quieter dishwasher and range hood during her appliance selection process, having learned from visiting other open-plan homes how much appliance noise can affect the whole combined space, not just the kitchen itself.
We also positioned her kitchen sink facing toward a window rather than directly into the living room’s main sightline, which minimized how visible dirty dishes and general kitchen mess became from her main seating area. This kind of sink and appliance placement consideration matters more in an open floor plan than in a kitchen that’s still separated from adjoining living spaces by an actual wall.
For anyone planning an open-concept renovation, I’d recommend researching appliance noise ratings more carefully than you might for a fully separated kitchen, along with considering sink and stove placement relative to sightlines from the living and dining areas, both practical considerations that become considerably more important once the physical separation between spaces is removed.
10. Use a Peninsula for Smaller Open-Plan Spaces
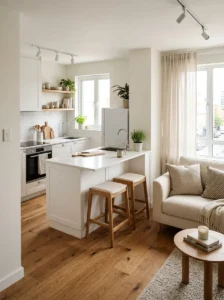
For a friend’s smaller open-plan renovation, where a full kitchen island wasn’t practical given the room’s overall dimensions, a peninsula, a countertop extension connected to existing cabinetry along one wall, provided similar zone-defining and functional benefits without requiring the additional floor space a freestanding island would have needed.
This peninsula served the same essential zone-dividing function as my sister’s island, marking the transition between kitchen and living areas, while its connection to the existing wall cabinetry meant it required less overall floor space clearance than a fully freestanding island would have.
For anyone with a smaller open-concept space, a peninsula is often a more practical solution than a full island, providing similar organizational and functional benefits while requiring meaningfully less overall square footage to implement effectively.
11. Layer Lighting Independently Across Each Zone
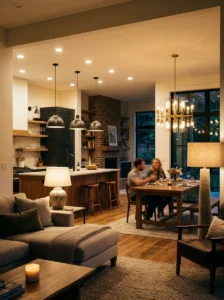
Similar to lighting lessons applied in other single-purpose rooms, my sister’s open-plan space benefited enormously from having each functional zone’s lighting on independent controls, kitchen task lighting, the dining pendant, and living room lamps and overhead fixtures, all separately adjustable rather than controlled by a single switch for the entire open area.
This independent control allows for genuinely different lighting scenarios depending on the specific activity happening in the space, bright, functional lighting in the kitchen while cooking, paired with dimmer, warmer lighting in the living area for relaxing, even though both zones exist within the same physical, undivided room.
I’d recommend prioritizing this kind of zone-specific lighting control early in any open-plan renovation planning process, since retrofitting additional switches or circuits after construction is complete tends to be considerably more disruptive than planning for it during the initial renovation phase.
12. Choose a Rug to Define the Living Area’s Boundaries
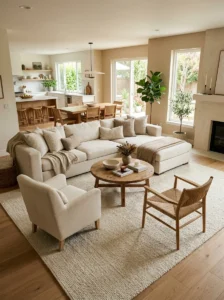
Without walls to define where the living room “ends” within an open floor plan, a properly sized area rug becomes one of the most effective tools for establishing that zone’s boundaries clearly. In my sister’s space, we chose a large rug sized to extend beneath the front legs of her sofa and chairs, clearly establishing the living area’s footprint distinct from the adjacent dining and kitchen zones.
Getting the rug size right mattered significantly here, an undersized rug, floating in the middle of the seating arrangement without reaching any of the furniture, actually made the zone feel less defined and more disconnected than having no rug at all in that early testing phase of our planning. Sizing up to properly anchor the furniture arrangement resolved this issue entirely.
This is a relatively straightforward, moderate-cost element compared to some other ideas on this list, but it provides genuine, clear zone definition within an open floor plan without requiring any structural changes or furniture placement compromises.
13. Create Visual Continuity With Repeated Design Elements
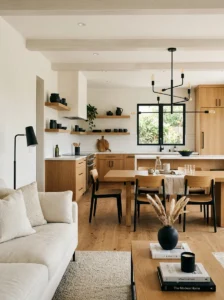
Beyond color palette and material coordination, we intentionally repeated a few specific design elements across different zones in my sister’s space, the same black metal finish appearing in her kitchen hardware, dining light fixture, and a living room floor lamp, which created a subtle, cohesive thread tying the whole open space together without requiring identical furniture or decor throughout.
This kind of repeated element, a specific metal finish, a particular wood tone, even a repeated decorative motif, provides genuine visual continuity across an open floor plan’s different functional zones without requiring everything to match exactly or feel monotonous. I’ve found this principle to be one of the more subtle but genuinely effective tools for unifying an open-plan space that serves several different functions simultaneously.
For anyone planning an open-concept space, identifying two or three specific elements, a metal finish, a wood tone, an accent color, to intentionally repeat across each zone can provide this same cohesive thread without requiring a complete, matching furniture and decor scheme throughout the entire space.
14. Balance Open Shelving With Closed Storage
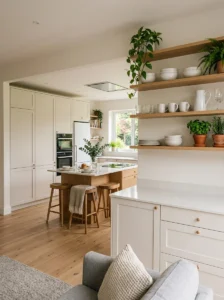
In an open-plan kitchen specifically, where sightlines into the kitchen from the living and dining areas are unavoidable, balancing open shelving, which requires more careful, ongoing styling and organization, with adequate closed cabinet storage for less attractive everyday items became an important consideration in my sister’s kitchen planning.
We used open shelving for a curated selection of attractive, everyday dishware, visible from the living area, while keeping bulkier, less visually appealing items, small appliances, food storage containers, in closed cabinets specifically positioned to minimize their visibility from the main living and dining sightlines. This balance matters more in an open-plan kitchen than in a fully separated one, since kitchen clutter and disorganization become visible from the entire combined living space rather than staying contained within a separate room.
I’d recommend, for anyone planning an open-plan kitchen renovation, being more conservative with the ratio of open to closed storage than you might in a fully separated kitchen, prioritizing closed storage for anything that doesn’t consistently look tidy and presentable, given how visible the kitchen becomes from the entire combined space.
15. lPna Traffic Flow Between All Three Zones
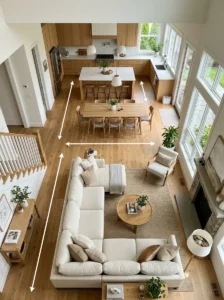
The final and perhaps most functionally important consideration in my sister’s renovation was ensuring clear, logical traffic pathways between the kitchen, dining, and living zones, rather than focusing purely on furniture placement and zone definition without considering how people would actually move through the combined space during daily use and entertaining.
We mapped out the most common paths, from the front door to the kitchen, from the kitchen to the dining table, from the dining area to the main living room seating, and made sure furniture placement throughout the space left at least three feet of clearance along each of these primary paths. This became particularly important when hosting larger gatherings, where guests need to move fluidly between cooking, eating, and relaxing areas without navigating around furniture placed without this consideration in mind.
This kind of traffic-flow planning is easy to overlook when focusing primarily on how each individual zone looks, but it genuinely affects how well an open-plan space functions during actual daily use and entertaining, which is ultimately the whole point of choosing this kind of connected, flowing layout in the first place.
Frequently Asked Questions
Is it expensive to convert a traditional layout into an open-plan space? It varies significantly depending on whether the dividing wall is load-bearing, which requires additional structural support and professional engineering assessment, versus a simple partition wall, which is typically a more straightforward and affordable renovation.
How do I keep an open-plan space from feeling too big or impersonal? Using furniture placement, rugs, and lighting to clearly define distinct zones within the larger space, rather than leaving everything undifferentiated, helps an open floor plan feel organized and intimate despite its overall larger scale.
What’s the best flooring choice for an open-plan kitchen, dining, and living space? A single, consistent material that’s durable and water-resistant enough for kitchen use, like luxury vinyl plank or a suitable tile, while still looking appropriate throughout the dining and living areas, tends to work best for maintaining a cohesive, unified feel.
Can I create zone definition in an open floor plan without any construction changes? Yes. Furniture placement, area rugs, lighting fixtures, and color coordination can all establish clear zone boundaries without requiring any structural changes to the existing open space.
Final Thoughts
Helping my sister plan her open-concept renovation, and later applying those lessons to my own home, taught me that a genuinely successful open-plan space requires more coordinated planning than three separate rooms ever did, even though the whole point of removing the walls was theoretically to simplify the overall layout. The key across all fifteen of these ideas is intentional coordination, of color, material, lighting, and furniture placement, paired with clear zone definition that doesn’t rely on actual walls. Get those elements right, and an open floor plan can feel genuinely spacious and connected rather than sprawling and disorganized, which is really the whole promise of this kind of layout in the first place.