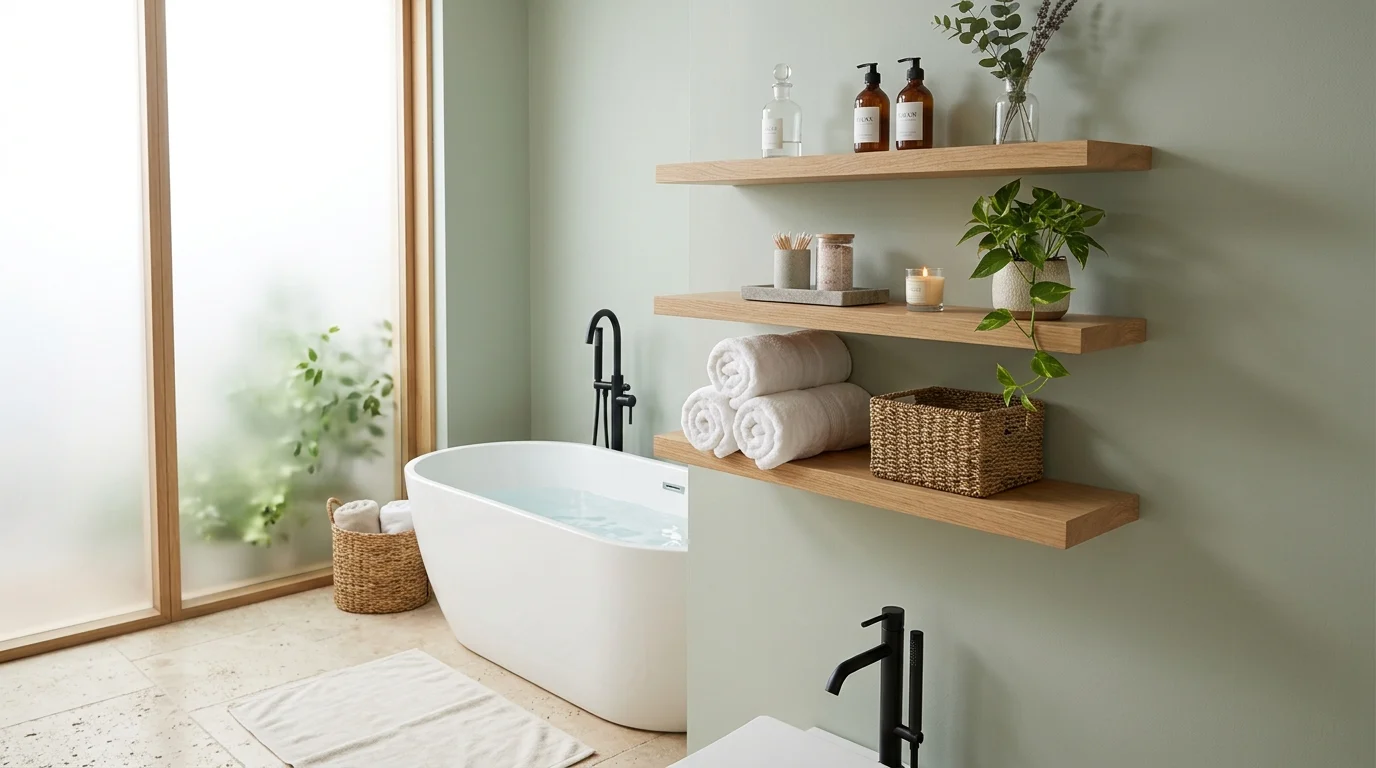
A few months after I finished redoing my bedroom, I turned my attention to the one room in my house that had been bothering me for years without me fully realizing it: my bathroom. It wasn’t dirty or outdated exactly, it just felt cluttered and cold, nothing like the calm, spa-like bathrooms I kept seeing in hotel photos and design magazines. The turning point, oddly enough, was a single open shelf above my bathtub that I’d never bothered to style properly. It had a half-empty shampoo bottle, a random hair tie, and a bar of soap still in its packaging just sitting there.
I started small, styling that one shelf properly, and the difference was honestly surprising. It didn’t just look better, it made the whole act of getting ready or taking a bath feel a little more intentional, a little more like a ritual instead of a rushed daily task. That small win sent me down a proper rabbit hole of bathroom shelf styling, and I ended up redoing every shelf in the room over the following weeks.
Here are 12 bathroom shelf styling ideas I’ve personally tested, refined, or borrowed from friends who’ve done the same, all aimed at getting that calm, spa-like look without needing a full renovation.
1. Group Items in Odd Numbers
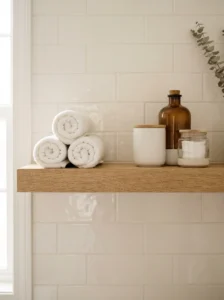
One of the first things I learned, almost by accident, is that shelves styled with three items look far more intentional than shelves with two or four. When I first arranged my bathroom shelf, I had four items lined up in a neat row, and it somehow still looked flat and uninteresting. I removed one item and regrouped the remaining three at slightly different heights, and the shelf immediately looked more curated.
This is a basic design principle, but it genuinely makes a difference in a small space like a bathroom shelf where every item is highly visible. I now consciously group things in threes wherever possible: three rolled towels, three glass jars, three candles of varying heights. Odd numbers, especially with varied heights, create a more natural, visually interesting arrangement than even, uniform groupings.
If you have more than three items you want to display, break them into multiple small groupings of three rather than one large cluttered row. On my longer shelf, I have two separate groupings of three items each, spaced apart with a bit of breathing room between them, rather than six items crammed together.
2. Decant Products Into Matching Containers
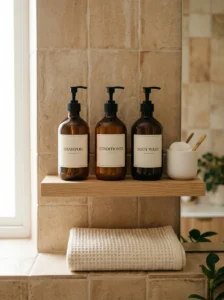
This was probably the single biggest visual upgrade I made, and also the one that required the most ongoing effort. I moved my shampoo, conditioner, and body wash out of their original colorful plastic bottles and into matching amber glass pump bottles with simple printed labels.
The instant uniformity this created was honestly dramatic. What used to look like a cluttered collection of mismatched brand packaging suddenly looked like a cohesive, spa-quality display. I chose amber glass specifically because it hides product discoloration over time better than clear glass, which a friend warned me about after her clear bottles started looking a bit murky within a few months.
I’ll be honest that refilling these bottles is a bit of an ongoing chore, and I don’t do it perfectly every time. But even doing this for just the products that stay visible on open shelving, while keeping backup supplies and less attractive bottles tucked in a cabinet, made a huge difference in how the room looks day to day.
3. Roll, Don’t Fold, Your Towels
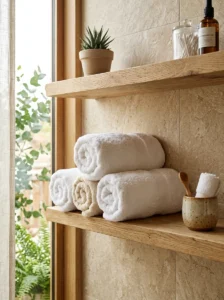
I picked this trick up from a hotel stay, of all places, and it’s genuinely one of the easiest changes on this entire list. Instead of folding my hand towels and washcloths flat, I started rolling them and stacking them on their sides on the shelf, similar to how spas and hotels typically display towels.
Rolled towels take up slightly more shelf depth than folded ones, so I had to rearrange a couple of other items to make room, but the visual payoff was worth it. A small stack of three or four rolled white towels looks noticeably more polished and spa-like than the same towels folded flat.
I also switched from my mismatched, colorful towel collection to all-white or all-cream towels specifically for open shelf display, while keeping my more colorful, mismatched towels in a drawer for actual daily family use. This two-tier system took a bit of getting used to, but it let me keep the aesthetic intact on the shelf without needing to replace every towel in the house.
4. Add a Living Plant
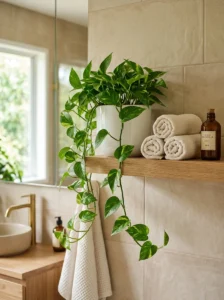
My bathroom doesn’t get a ton of natural light, so I was initially skeptical about adding a real plant, worried it would just die within a few weeks like most of my past attempts at houseplants. After some research, I settled on a small pothos, which tolerates lower light and higher humidity remarkably well, and it’s honestly thriving on my bathroom shelf months later.
The plant adds a genuine sense of life and softness to the shelf that no styled object quite replicates. It also breaks up what would otherwise be a very rigid, product-focused display with something organic and slightly imperfect, which is exactly the kind of contrast that keeps a styled shelf from looking too stiff or showroom-like.
If your bathroom genuinely doesn’t get enough light or humidity for a real plant, a high-quality faux plant can work as a substitute, though I’d recommend spending a little more for one with a realistic texture rather than the cheaper, obviously plastic-looking varieties, which can undermine the whole calm, natural feeling you’re going for.
5. Layer in Natural Textures
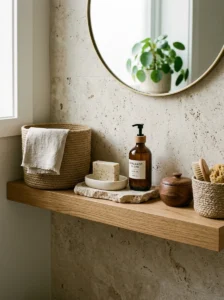
Similar to what I learned redoing my bedroom, texture variation makes a huge difference on a bathroom shelf. My shelf now includes a small woven basket for cotton balls and rounds, a smooth ceramic soap dish, and a rough-textured stone tray for holding a bar of soap, each material contrasting with the next.
This mix of textures, wood, ceramic, glass, woven fiber, and stone, keeps the shelf visually interesting even though the overall color palette stays fairly neutral. When I first started styling this shelf, everything was either glass or plastic, and it looked strangely sterile despite technically being tidy.
I’d recommend walking through your existing bathroom items and noting how many different materials are actually represented. If it’s mostly plastic and glass, introducing even one or two natural-material pieces, a small wood tray or a woven basket, can shift the entire feel of the shelf toward that warmer, spa-like look.
6. Use a Tray to Anchor Small Items
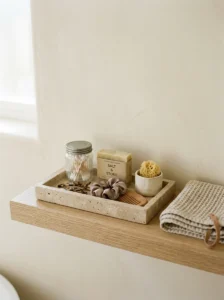
Loose small items scattered across a shelf, cotton swabs, hair ties, a nail file, tend to look messy no matter how you arrange them. I started corralling these smaller everyday items onto a single small tray, which instantly made the shelf look more organized even though the actual number of items didn’t change.
The tray acts almost like a frame, visually grouping the smaller, less attractive necessities into one contained area rather than letting them spread across the whole shelf. I chose a simple stone tray, but a wood or ceramic tray works just as well, as long as it fits the overall material palette of the rest of your shelf.
This trick has been particularly useful for my bathroom counter as well as the open shelving, since it’s an easy way to keep frequently used items accessible without letting them create visual clutter across the whole surface.
7. Stick to a Limited Color Palette
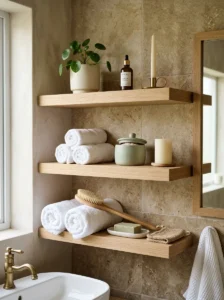
Early on, my bathroom shelf had a lot of accidental color chaos, a blue shampoo bottle, a pink razor, a yellow candle, none of which were chosen with the shelf’s overall look in mind. Once I started paying attention to color palette the same way I had in my bedroom redo, the shelf became noticeably calmer and more cohesive.
I settled on a palette of white, cream, soft sage green, and natural wood tones, and I now try to keep any new bathroom purchase within that general range when it’s something that will end up visible on the shelf. This doesn’t mean every single product in my house matches, just the ones I choose to display openly.
If a product doesn’t fit the palette but you don’t want to decant it into a new container, tucking it into a drawer or cabinet rather than displaying it on the open shelf is usually the simpler solution, which is exactly what I do with anything in bold, mismatched packaging now.
8. Add a Candle for Ambiance
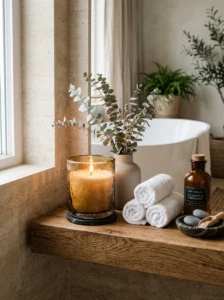
A simple, unscented or lightly scented candle on my bathroom shelf became one of those small additions that punches well above its actual cost. Beyond the visual appeal of a nice candle vessel sitting among the other styled items, actually lighting it during a bath or shower genuinely elevates the whole experience.
I chose a candle in a thick, textured glass vessel that looks good even when not lit, rather than a plain, purely functional jar candle. I also learned to pick a scent carefully, since bathroom humidity can sometimes intensify certain fragrances, a lesson I learned after an overly strong vanilla candle became almost overwhelming in the smaller, steamier space.
Light, clean scents, eucalyptus, fresh linen, mild citrus, tend to work best in a bathroom setting without becoming overpowering once the room heats up from a hot shower or bath.
9. Incorporate a Small Stack of Books or a Single Art Print
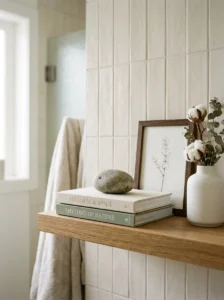
This detail felt unnecessary to me at first, styling a bathroom shelf with actual reading material or art seemed excessive for a functional space. But after seeing it done well in a friend’s guest bathroom, a small stack of two or three neutral-covered books with a small decorative object on top, I tried it myself and it genuinely added a sophisticated, unexpected touch.
I chose books based partly on spine color, favoring cream, white, and soft green covers that fit my existing palette, similar to how I curated books for my bedroom nightstand. A small decorative object, in my case a smooth stone, sits on top of the stack, adding height variation to that section of the shelf.
Alternatively, if your bathroom has any bare wall space near the shelf, a single small piece of simple art or a framed print in a water-resistant format can serve a similar purpose, adding a personal, curated touch that goes beyond purely functional bathroom products.
10. Vary Your Heights Deliberately
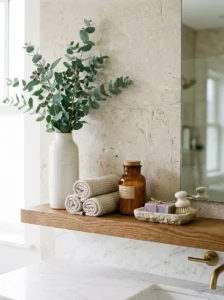
I noticed early on that my shelf styling looked flat and uninteresting whenever everything sat at roughly the same height. Once I started deliberately varying heights, a taller vase or candle at the back, medium-height items like folded towels in the middle, and small objects like a soap dish toward the front, the whole arrangement suddenly looked more dynamic and professionally styled.
This “step” effect, tall to short, moving from back to front or side to side, is a basic styling principle I picked up from watching how professional stylists arrange shelves in home design content, and it’s remarkably easy to apply once you’re aware of it.
If everything on your shelf currently sits at a similar height, even swapping in one taller item, a vase, a stack of books, a tall canister, can immediately break up the monotony and make the whole grouping feel more considered.
11. Keep Everyday Clutter Elsewhere
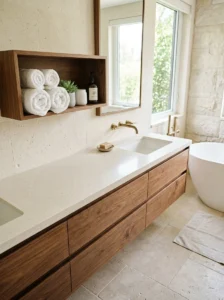
This might be the least glamorous tip on this list, but it’s genuinely one of the most important. My spa-like shelf only stays looking spa-like because I keep actual daily-use clutter, my regular toothbrush, dental floss, daily moisturizer, in a drawer or medicine cabinet rather than on the open shelf itself.
I learned this the hard way after styling my shelf beautifully one weekend, only to have it look cluttered again within a few days simply from normal daily use. Now I have a clear separation: the open shelf holds mostly styled, less frequently handled items, while a nearby drawer holds everything I actually touch multiple times a day.
If you don’t have drawer or cabinet space available, even a simple lidded basket tucked to the side of the shelf can hold daily-use items out of sight, keeping the main visible display intact without requiring you to give up easy access to things you actually need every day.
12. Refresh the Shelf Seasonally
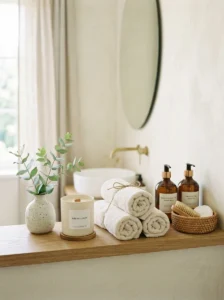
The final habit that’s kept my bathroom shelf feeling intentional rather than static is a small seasonal refresh, swapping out a candle scent, adding a small seasonal stem or branch to a bud vase, or rotating which stack of towels is on display based on the season.
In warmer months, I lean into lighter, citrus-toned candles and a small eucalyptus stem in a bud vase, while in cooler months I switch to a slightly warmer candle scent and swap the greenery for a small dried branch arrangement instead. These changes take only a few minutes but keep the space feeling fresh and considered rather than like a display I set up once and forgot about.
This habit also gives me a regular, low-effort opportunity to reassess the shelf overall, wiping down containers, refilling decanted products, and generally maintaining the spa-like look rather than letting it slowly slide back into clutter over time.
Frequently Asked Questions
What’s the easiest way to start styling a bathroom shelf on a budget? Start with decluttering and grouping existing items in odd-numbered clusters. This costs nothing and makes an immediate visual difference before you spend money on new containers or accessories.
Do decanted product bottles need to be refilled often? It depends on usage, but most people refill weekly or biweekly. Keeping backup supplies in a cabinet rather than trying to decant everything at once makes this more manageable.
Can I get a spa-like look without any plants? Yes, though a real or high-quality faux plant adds a lot of softness. If plants aren’t an option, focus on natural textures like wood, stone, and woven baskets instead to achieve a similar organic feel.
How do I keep a styled shelf from looking cluttered again quickly? Separate your styled, less-frequently-used display items from your actual daily-use products, keeping the latter in a drawer or cabinet rather than on the open shelf.
Final Thoughts
Styling my bathroom shelf started as a small, almost accidental project, but it ended up teaching me a lot of the same lessons I’d learned redoing my bedroom: restraint, texture variation, and a limited color palette go a long way toward creating a calm, spa-like feeling. None of these twelve ideas require a major renovation or a large budget, just some thoughtful rearranging and a willingness to keep daily clutter out of sight. Start with one shelf, live with it for a week or two, and you’ll likely find, like I did, that it changes how the whole room feels every time you walk in.