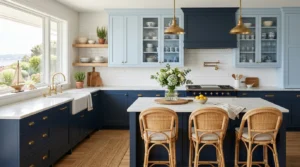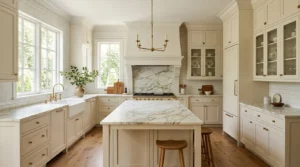
Our first apartment kitchen was genuinely tiny, barely enough room for two people to stand comfortably at the same time, and for the first year we lived there I assumed the only real solution would eventually be moving somewhere with more square footage. It wasn’t until a friend who’d spent years working in restaurant kitchen design visited and rearranged our layout in an afternoon, moving nothing structural, just rethinking how the existing space was actually being used, that I realized how much a smart layout can accomplish without adding a single square foot. That small kitchen went from genuinely frustrating to something I actually enjoyed cooking in, purely through better planning.
Since then, I’ve paid much closer attention to how small kitchens are laid out, both in our own subsequent homes and in projects I’ve helped friends with. Below are 23 small kitchen layout ideas based on real spaces I’ve lived in or worked on, focused on genuine functional improvement rather than just visual tricks that photograph well but don’t actually solve the daily friction of cooking in a tight space.
1. The Galley Layout with Parallel Counters
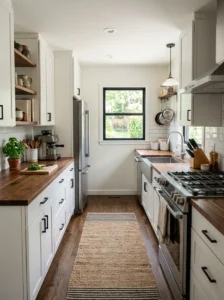
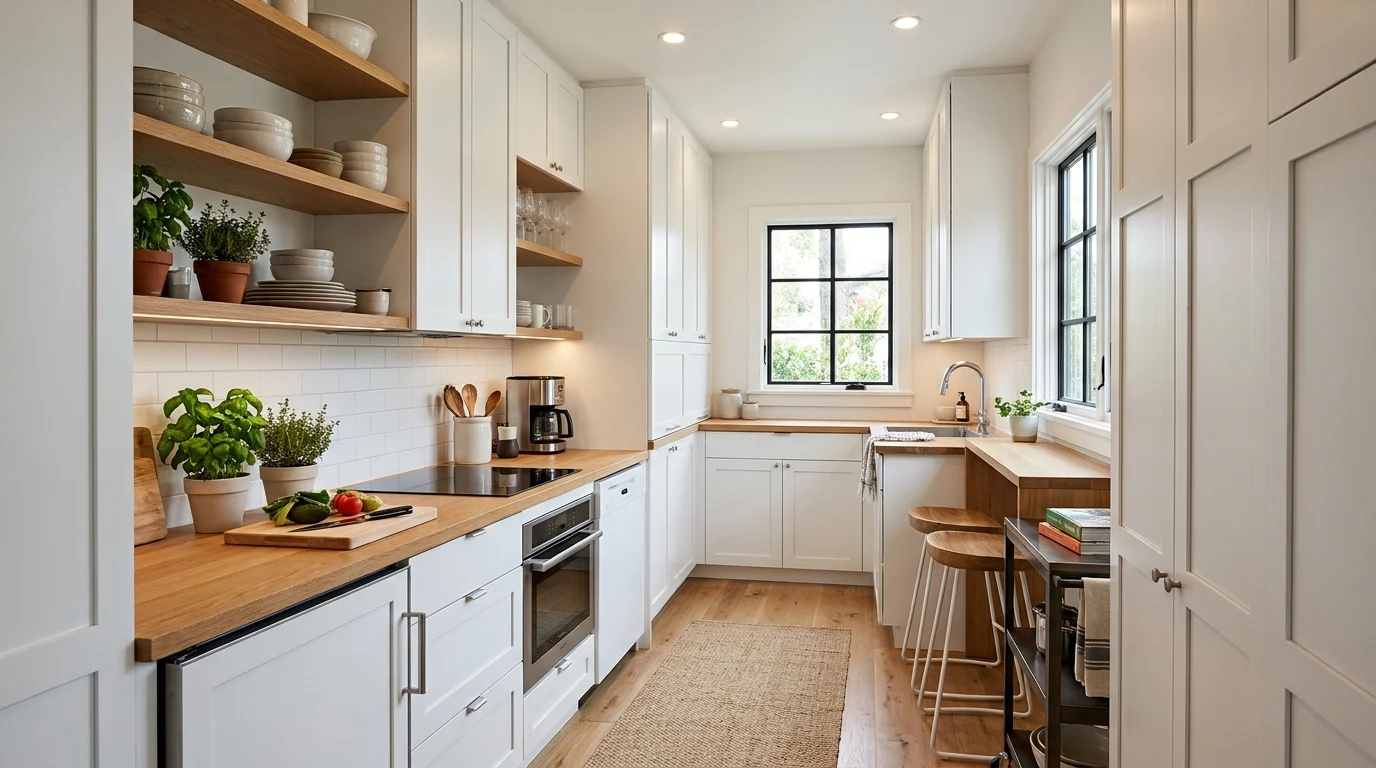
A galley kitchen, with two parallel counters facing each other along a single walkway, remains one of the most efficient layouts specifically for small spaces, since it keeps every work zone within just a step or two of every other zone. Our current kitchen uses this layout, and after living with a more sprawling, less efficient layout in a previous home, the difference in how little unnecessary walking cooking actually requires here has been genuinely noticeable.
The key to making a galley layout work well, rather than just tolerably, is maintaining adequate walkway width between the two counters, generally at least forty-two inches if only one person typically cooks at a time, and closer to forty-eight inches if two people regularly work in the kitchen together. I’d recommend measuring this clearance carefully before finalizing any galley layout, since a walkway that’s too narrow makes the whole space feel cramped and difficult to move through, even if the counters themselves offer plenty of storage and workspace.
Positioning your primary work triangle, sink, stove, and refrigerator, across the two counters rather than clustering them all on one side keeps you moving naturally between zones as you cook, rather than needing to backtrack repeatedly. I’d suggest placing your refrigerator at one end of the galley specifically, since this keeps its door swing from interfering with the main cooking and prep zones in the middle of the layout.
2. An L-Shaped Layout with a Corner Anchor
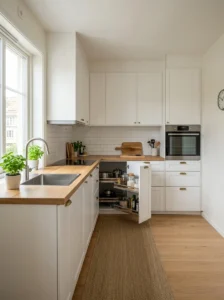
An L-shaped kitchen, wrapping around two adjoining walls, makes efficient use of a room’s corner while still leaving the remaining floor space open for a small table or additional storage. I helped a friend redesign her kitchen this way, converting what had been a fairly awkward, disconnected layout into a cohesive L-shape anchored around the room’s natural corner, and the resulting flow between her sink, stove, and prep area became noticeably more intuitive.
The corner itself, where the two counter runs meet, deserves particular planning attention in a small L-shaped kitchen, since this spot can easily become dead, hard-to-reach space if not addressed specifically. I’d recommend a corner cabinet with a lazy Susan or a pull-out carousel system here, rather than standard fixed shelving, since these mechanisms let you actually access the full depth of the corner rather than losing usable storage to an awkward, hard-to-reach void.
I’d suggest positioning your stove and sink on the longer of the two counter runs, keeping the shorter run for secondary storage or a smaller prep area, since this generally creates a more natural, efficient flow than splitting your primary cooking functions evenly across both walls in a way that requires more unnecessary crossing back and forth during actual cooking.
3. A U-Shaped Layout for Maximum Storage
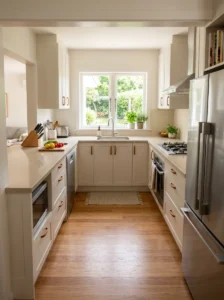
For slightly larger small kitchens, a U-shaped layout, wrapping around three walls, maximizes available counter and storage space more than almost any other configuration, essentially surrounding the cook with everything they need within a tight, efficient radius. We used this layout in a previous home’s kitchen, and despite the room’s fairly modest overall square footage, the U-shape genuinely made it feel like we had more storage and counter space than several larger, less efficiently laid out kitchens I’ve worked in since.
The main consideration with a U-shaped layout in a genuinely small room is ensuring the open end of the U provides adequate clearance, generally at least sixty inches across, for comfortable movement in and out of the kitchen and enough room to open the oven or dishwasher doors without obstruction. I’d recommend measuring this open clearance carefully before committing to a full U-shape, since a U that’s too tight can end up feeling more enclosing than efficient.
I’d suggest positioning your sink at the base of the U, the wall opposite the opening, with your stove and refrigerator on the two side walls, creating a natural, efficient triangle that keeps your most frequently used appliances and fixtures within just a step or two of each other throughout most cooking tasks.
4. A Single-Wall Layout for Very Compact Spaces
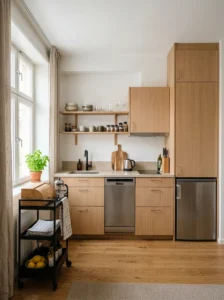
For genuinely tiny kitchens, studio apartments, smaller guest houses, a single-wall layout, with all appliances, storage, and counter space arranged along one continuous wall, is often the only truly practical option, and it can work considerably better than people initially expect when planned thoughtfully. I set up a kitchen this way in a small guest cottage, and careful attention to the specific order and spacing of elements along that single wall made a genuinely significant difference in how functional the tight space actually felt.
The order of elements along the wall matters considerably here, since there’s no ability to create a genuine work triangle in a single-wall layout, everything sits in a straight line instead. I’d recommend positioning your stove and sink relatively close together, with a reasonable stretch of counter space between them for prep work, rather than spacing them at opposite ends of the wall, which would require considerably more unnecessary walking back and forth during actual cooking.
Vertical storage becomes especially important in this layout, since you can’t rely on additional counter runs to provide extra storage capacity the way an L-shape or U-shape would. I’d suggest maximizing upper cabinet or open shelving height, extending storage as close to the ceiling as practical, and considering a narrow rolling cart for additional, flexible counter and storage space that can be tucked away when not actively needed.
5. A Peninsula for Added Counter Space
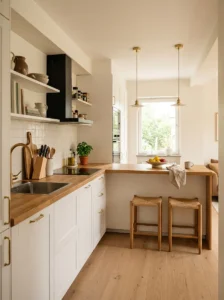
Adding a peninsula, a counter extension jutting out from an existing wall run rather than a fully freestanding island, provides significant additional counter space and a natural spot for casual seating, without requiring the floor clearance a full island demands. I added a peninsula to a client’s small kitchen during a renovation, extending from her existing L-shaped counter run, and the additional workspace and casual seating it provided made the kitchen function considerably better for both cooking and quick, everyday meals.
I’d recommend a peninsula specifically over a full island in genuinely tight kitchens, since it only requires clearance on three sides rather than the full walking clearance a freestanding island needs on all four sides, making it considerably more achievable in a smaller footprint. A peninsula also benefits from being anchored to existing plumbing or electrical if positioned near your sink or stove, potentially simplifying installation compared to running new utilities out to a fully freestanding island.
Standard clearance guidelines still apply on the open sides of a peninsula, generally at least thirty-six inches for walking clearance, and slightly more if you’re incorporating seating that people need to pull a stool back from to actually sit down and get up comfortably. I’d suggest measuring your available space carefully against these specific clearance needs before committing to a peninsula’s exact dimensions and placement.
6. Open Shelving to Visually Expand the Space
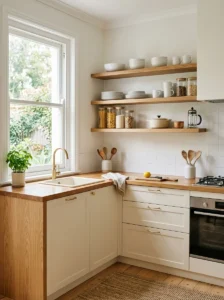
Replacing at least some upper cabinets with open shelving doesn’t just change storage style, it genuinely affects how spacious a small kitchen feels, since open shelves don’t create the same visual bulk and enclosure that solid cabinet doors do. We made this switch in a previous small kitchen, replacing upper cabinets on one wall with simple open shelves, and the room felt noticeably lighter and larger immediately, even though we hadn’t changed the room’s actual dimensions at all.
I’d recommend this specifically for at least one wall in a small kitchen, rather than necessarily converting every single upper cabinet, since a full room of open shelving requires more consistent tidiness than most households genuinely maintain, while a partial conversion offers much of the visual benefit while still providing some concealed storage for less attractive items elsewhere in the room.
Keeping displayed items on open shelves genuinely organized and not overly crowded matters more in a small kitchen than a larger one, since a cluttered open shelf reads as considerably more chaotic in a tight space where it’s more immediately visible from most angles of the room, compared to a similar shelf in a larger kitchen where it might be one of several competing focal points rather than a dominant one.
7. A Fold-Down or Wall-Mounted Table
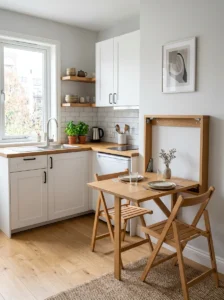
For kitchens too small to accommodate a permanent table, even a small one, a fold-down or wall-mounted table provides flexible additional workspace or casual dining space exactly when needed, then tucks away completely out of the way when it isn’t. I installed one of these in a genuinely tiny apartment kitchen, and being able to fold the table flat against the wall when not in use meant the room retained its full floor space for cooking and movement most of the time, while still offering a genuine dining or extra prep spot when needed.
I’d recommend sturdy, properly rated folding hardware specifically for this application, rather than a lightweight or purely decorative mechanism, since a wall-mounted table needs to reliably support actual weight, both from food preparation and from anyone sitting to eat at it, without wobbling or feeling unstable during regular use.
This solution works particularly well combined with folding or stackable chairs, which can be stored elsewhere when not in use, maintaining the kitchen’s full open floor space during regular cooking and cleaning, then quickly set up alongside the table whenever you actually need seating for a meal or additional workspace.
8. Under-Counter Refrigeration to Free Up Floor Space
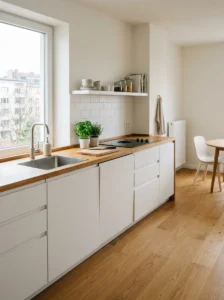
Replacing a standard full-height refrigerator with under-counter refrigeration units, tucked beneath the counter rather than standing as a tall, separate appliance, frees up considerable visual and physical space in a genuinely tight kitchen. I specified this approach for a client’s very small urban kitchen, using two separate under-counter units, one for the refrigerator and one dedicated to a freezer, rather than a single tall, freestanding appliance, and the resulting layout felt considerably more open and less visually dominated by a single large appliance.
I’d recommend this option specifically for households whose refrigeration needs are genuinely modest, since under-counter units offer meaningfully less total capacity than a standard full-height refrigerator, meaning this solution suits a single person or couple considerably better than a larger family with more substantial grocery storage needs.
This approach does typically cost more than a standard refrigerator purchase, given the specialized nature of under-counter units and often the need for custom cabinetry integration around them, so I’d suggest this specifically for households genuinely prioritizing open floor space and willing to invest accordingly, rather than as a default recommendation for every small kitchen renovation regardless of budget.
9. A Rolling Kitchen Cart for Flexible Extra Space
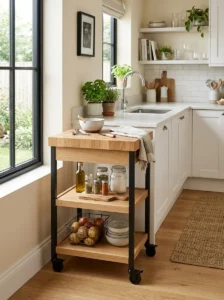
A rolling kitchen cart, with a butcher block or similar work surface on top and storage below, provides genuinely flexible additional counter space and storage that can be repositioned exactly where needed and moved out of the way entirely when it isn’t. I use one in my own smaller kitchen specifically for this flexibility, rolling it out for extra prep space when cooking something more involved, then tucking it into a corner or against a wall the rest of the time to keep the main floor space clear.
I’d recommend a cart with locking casters specifically, ensuring it stays securely in place once positioned for actual use, rather than shifting or rolling unexpectedly while you’re working on it. A cart with additional features, a built-in towel bar, a small drawer, hooks for hanging utensils, adds genuine functional value beyond just the basic extra counter surface, making the most of this relatively compact additional piece.
This solution works particularly well for renters or anyone not wanting to commit to permanent structural changes, since a rolling cart requires no installation at all and can move with you to a future home, unlike more permanent solutions like a built-in peninsula or custom cabinetry addition.
10. Vertical Pot Rack for Overhead Storage
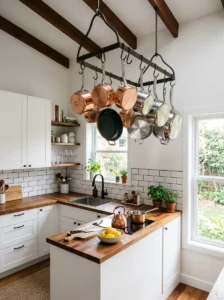
Hanging pots and pans from a ceiling-mounted or wall-mounted rack frees up considerable cabinet space that would otherwise be needed to store this often bulky cookware, while also keeping frequently used pieces genuinely within easy reach during actual cooking. I installed a simple ceiling-mounted rack above our small kitchen’s island area, and reclaiming the cabinet space previously dedicated to stacked, awkwardly stored pots made a genuinely significant difference in how much easier the rest of our storage became to organize and access.
I’d recommend this option specifically for kitchens with adequate ceiling height to accommodate hanging cookware without anyone needing to duck beneath it while moving through the space, since a poorly positioned pot rack in a room with lower ceilings can become a genuine daily hazard rather than a helpful storage solution.
For kitchens without adequate ceiling clearance for an overhead rack, a wall-mounted version, positioned above a counter or beside the stove, achieves much of the same space-saving benefit without requiring the same overhead clearance considerations, though it does use up some of your available wall space that might otherwise go toward shelving or additional storage elsewhere.
11. A Narrow Rolling Pantry for Slim Gap
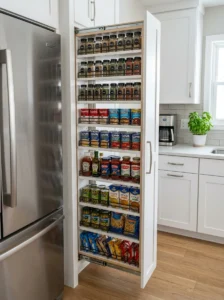
The narrow gap that sometimes exists between a refrigerator and an adjacent wall or cabinet, often too slim for standard cabinetry but genuinely too wide to simply leave empty, is an excellent spot for a narrow, pull-out rolling pantry unit specifically designed for these tight dimensions. I fit one of these into a roughly six-inch gap in a client’s kitchen, a space that had previously been entirely wasted, and the resulting slim pantry provided meaningful additional storage for canned goods and smaller pantry items without requiring any broader kitchen reconfiguration at all.
I’d recommend measuring this kind of gap very precisely before purchasing or having a unit built, since even a small discrepancy can mean the difference between a unit that fits smoothly and one that either doesn’t fit at all or rubs uncomfortably against the surrounding cabinetry each time it’s opened and closed.
These narrow units typically use pull-out wire baskets or shelves specifically designed for slim, single-item-deep storage, letting you see and access everything at a glance rather than needing to dig through deeper, more traditional pantry shelving. I’d suggest this solution specifically for any small kitchen with this kind of narrow, otherwise-wasted gap between appliances or cabinetry, since it’s one of the few genuinely low-cost ways to add real additional storage without any broader layout changes.
12. Stacked Appliances to Reduce Footprint
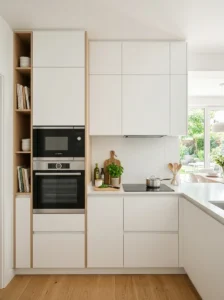
Stacking appliances vertically rather than positioning them side by side, a wall oven above a built-in microwave, or a stacked washer and dryer if your kitchen includes laundry facilities, reduces the total floor footprint these appliances require, freeing up that reclaimed floor space for additional counter or storage elsewhere. I specified stacked wall ovens for a client’s small kitchen renovation, replacing a standard range that had taken up considerably more floor width, and the reclaimed space allowed for additional counter area that made a genuine functional difference in her daily cooking routine.
I’d recommend this approach specifically during a full renovation or new kitchen build, rather than as a retrofit to an existing kitchen, since stacked appliance configurations generally require specific cabinetry and electrical planning from the outset, making it considerably more complicated and costly to convert an already-completed kitchen to this configuration after the fact.
This solution works particularly well for households who use their oven and microwave separately rather than simultaneously very often, since stacked units, while saving floor space, do require slightly more consideration for reach and ergonomics, particularly for the upper unit, compared to appliances positioned at more uniform, easily accessible heights across a standard counter run.
13. A Breakfast Bar Instead of a Full Table
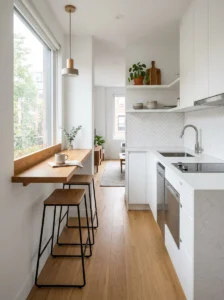
For kitchens too small to accommodate even a compact table and chairs, a narrow breakfast bar, either built into an extended counter or a slim, wall-mounted ledge, provides functional seating for quick meals without requiring the floor space a full table and chair set would demand. I added a narrow breakfast bar along one wall of a client’s small kitchen, using simple bar stools that tuck fully beneath it when not in use, and the resulting seating solution took up remarkably little permanent floor space while still providing a genuine spot for quick daily meals.
I’d recommend a bar height of standard counter height, roughly thirty-six inches, paired with counter-height stools, rather than the taller bar height requiring taller stools, since standard counter height generally integrates more seamlessly with the rest of a kitchen’s existing counter surfaces and cabinetry, both visually and in terms of construction complexity.
Stool selection matters considerably for how much this solution actually saves in usable floor space, I’d suggest backless stools that tuck fully beneath the counter overhang when not in use, rather than stools with substantial backs that can’t slide as far underneath, since the whole benefit of this approach depends on genuinely reclaiming that floor space during the majority of the time the kitchen isn’t actively being used for a meal.
14. Door-Mounted Storage Racks
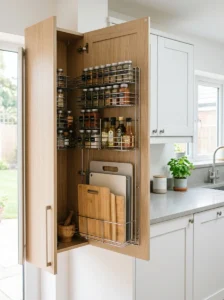
Attaching storage racks or organizers directly to the inside of cabinet or pantry doors captures otherwise completely unused space, often adding meaningful additional storage capacity without requiring any structural changes or additional floor footprint at all. I added simple wire door-mounted racks to several cabinet doors in a small kitchen, dedicating them specifically to items like spice jars, small cleaning supplies, and cutting boards, and reclaiming this previously unused space made a genuine difference in how much less crowded the actual shelving behind those doors needed to be.
I’d recommend checking the specific weight capacity of any door-mounted rack before loading it up, and ensuring your cabinet door’s hinges are genuinely sturdy enough to support the additional weight over time, since a rack loaded beyond its intended capacity, or mounted on hinges not built for the extra load, can eventually cause the door to sag or the hinges to fail prematurely.
This solution works particularly well for lightweight, frequently accessed items specifically, spices, small bottles, thin cutting boards, rather than heavier cookware or bulk pantry goods, which are better suited to more substantial, traditional shelving rather than a door-mounted rack’s generally more limited weight capacity.
15. A Corner Sink to Free Up Counter Run
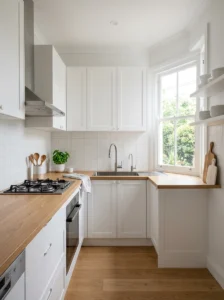
Positioning the sink specifically in a corner, rather than centered along a standard counter run, is a somewhat less common but genuinely effective way to reclaim additional usable counter space along the remaining straight sections of counter in a small kitchen. I specified a corner sink for a client’s compact L-shaped kitchen, and moving the sink out of the middle of her primary counter run freed up a meaningfully longer, uninterrupted stretch of prep space that had previously been broken up by the sink sitting directly in the middle of it.
Corner sink installation does require specific corner-designed cabinetry and plumbing configuration, generally somewhat more complex than a standard straight-run sink installation, so I’d recommend this specifically during a fuller kitchen renovation or new build, rather than as a simple retrofit to an existing straight-run counter and cabinet configuration.
I’d suggest this option specifically for L-shaped or U-shaped small kitchens where the corner itself might otherwise become somewhat awkward, hard-to-use space, similar to the corner cabinet challenges discussed in the L-shaped layout idea earlier, effectively turning a potentially difficult corner into a genuinely functional, well-used part of the kitchen’s overall layout.
16. Magnetic Knife Strips to Free Up Drawer Space
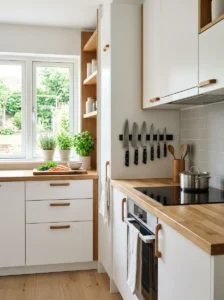
A wall-mounted magnetic knife strip keeps your knife collection genuinely accessible and visible while completely freeing up the drawer space a traditional knife block or in-drawer knife storage would otherwise require, a small but genuinely meaningful reclaim of storage capacity in a tight kitchen. I installed one beside our stove specifically, and beyond the practical convenience of having knives immediately visible and reachable during actual cooking, eliminating our old knife block freed up an entire drawer for other, previously crowded kitchen tools.
I’d recommend positioning a magnetic strip somewhere genuinely convenient for your actual cooking flow, near your primary prep area or cutting board location, rather than in a spot that’s visually appealing but impractical for how you actually move through the kitchen while cooking, since the whole benefit depends on the knives being genuinely easy to reach exactly when and where you need them.
Safety is worth mentioning directly here too, particularly in households with young children, since a magnetic strip keeps knives more visibly accessible than a closed drawer or block would. I’d suggest positioning the strip at a height clearly out of reach for any children in the household, and considering whether this specific storage solution genuinely suits your household’s particular safety needs before installing it.
17. A Pegboard Wall for Fully Customizable Storage
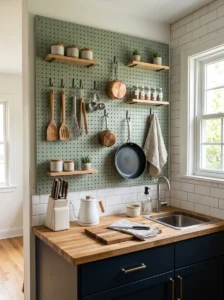
A pegboard, mounted to an available wall section and outfitted with hooks, small shelves, and other accessories, provides genuinely flexible, fully customizable storage that can be reconfigured as your specific needs and collection of tools and cookware changes over time. I installed a pegboard wall in a small rental kitchen specifically because it required no permanent structural modification, just the pegboard itself mounted to the wall, while still providing substantial additional storage capacity for everything from utensils to small pots and pans.
I’d recommend painting the pegboard to match or complement your kitchen’s existing color palette, rather than leaving it in a plain, unfinished material color, since a painted pegboard integrates considerably more cohesively into the room’s overall design rather than reading as a purely utilitarian, garage-style addition that feels out of place in a kitchen setting.
The genuine flexibility here is the biggest advantage over more fixed storage solutions, I’d suggest periodically reassessing what’s hanging where as your actual cooking habits and tool collection evolve over time, taking full advantage of how easily hooks and small shelves can be repositioned compared to fixed cabinet or drawer configurations that don’t offer this same adaptability.
18. Toe-Kick Drawers for Overlooked Storage
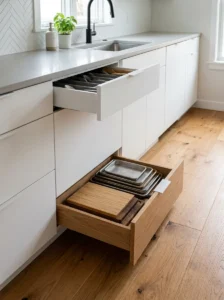
The typically empty toe-kick space beneath standard base cabinets, generally left as simple recessed empty space for foot clearance while standing at the counter, can instead house shallow, specifically designed drawers that capture otherwise completely wasted storage capacity. I had these installed during a client’s kitchen renovation specifically along one section of base cabinets, using the reclaimed space for flat items like baking sheets and cutting boards that don’t require much vertical clearance to store.
I’d recommend this addition specifically during new cabinet installation or a fuller renovation, rather than as a retrofit to existing cabinetry, since converting an already-installed standard toe-kick space into functional drawer storage after the fact is considerably more complicated and costly than incorporating this feature into the initial cabinet design and installation process.
These shallow drawers work best for genuinely flat, low-profile items specifically, given their limited vertical clearance, baking sheets, cutting boards, perhaps a rolling pin, rather than bulkier cookware that wouldn’t actually fit within the toe-kick space’s inherently limited height. I’d suggest this solution specifically for households with a meaningful collection of these particular flat items that would otherwise compete for space in more conventional, deeper cabinet storage elsewhere in the kitchen.
19. A Fold-Out Cutting Board Over the Sink
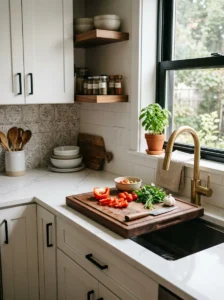
A cutting board specifically sized and designed to rest across the top of your sink, rather than requiring separate counter space, effectively adds a temporary additional work surface exactly when you need it for prep work, then tucks away completely once you’re finished. I use one of these regularly in our smaller kitchen, and being able to genuinely double our available prep space for the duration of actual chopping and prep work, without any permanent structural change at all, has made a meaningful difference in how much less cramped meal prep feels overall.
I’d recommend measuring your specific sink’s dimensions carefully before purchasing this kind of cutting board, since these are generally designed with side ledges meant to rest securely on your sink’s specific rim width, and a board that doesn’t match your sink’s actual dimensions won’t sit securely or safely during actual use.
This solution pairs particularly well with a single-basin sink specifically, since a divided double-basin sink can make it more difficult for this kind of over-sink board to sit level and stable across the full width. I’d suggest this as a genuinely low-cost, easy first step for anyone feeling cramped in a small kitchen, since it requires no installation or structural change at all, just purchasing the correctly sized board itself.
20. Recessed or Shallow-Depth Upper Cabinets
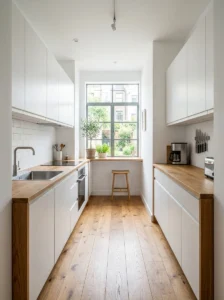
Choosing upper cabinets with a shallower depth than standard, typically closer to nine or ten inches rather than the more common twelve, reclaims a small but genuinely meaningful amount of walkway and workspace clearance in a tight galley or narrow kitchen, without sacrificing the cabinets’ basic function. I specified this shallower cabinet depth for a client’s genuinely tight galley kitchen renovation, and the resulting few extra inches of clearance throughout the main walkway made the whole space feel noticeably less cramped during actual daily use.
I’d recommend this option specifically for galley or single-wall layouts where every inch of walkway clearance genuinely matters, rather than for more spacious L-shaped or U-shaped kitchens where this smaller depth reduction wouldn’t provide as meaningful a practical benefit relative to the storage capacity you’d be sacrificing in exchange.
Shallower cabinets do hold somewhat less than standard depth cabinets, so I’d suggest pairing this choice with some of the other storage-maximizing ideas throughout this list, open shelving, door-mounted racks, a pegboard wall, to help compensate for the somewhat reduced capacity these shallower upper cabinets provide compared to a standard depth alternative.
21. A Fold-Down Wall-Mounted Ironing Board Turned Prep Station
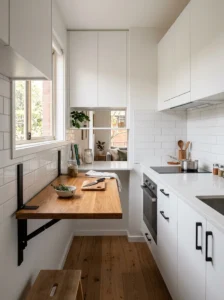
Repurposing the fold-down mounting concept more commonly used for ironing boards, discussed in earlier storage-focused projects, specifically as a small, fold-down prep station or additional counter surface brings genuine flexible workspace to a kitchen too tight for permanent additional counter area. I installed one of these in a genuinely compact kitchen specifically as extra prep space, tucked flush against the wall when not needed and folding down to provide a small but genuinely useful additional work surface during actual cooking.
I’d recommend sturdy, properly weight-rated folding hardware specifically for this application, similar to the earlier discussion of fold-down tables, since this surface needs to reliably support genuine food preparation weight and activity without wobbling or feeling unstable during regular use.
This solution works particularly well positioned near your primary prep zone, close to the stove or main counter run, rather than in a more disconnected corner of the kitchen, ensuring the additional workspace genuinely integrates into your actual cooking flow rather than sitting underused simply because it’s inconveniently positioned relative to where you actually do most of your prep work.
22. Clear Acrylic or Glass-Front Storage for Visual Lightness
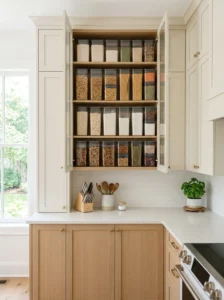
Choosing clear acrylic bins or glass-front cabinet sections specifically for pantry and dry goods storage, rather than opaque containers or solid cabinet doors, adds a subtle but genuine sense of visual lightness and openness to a small kitchen’s overall feel, since you can see through to the contents rather than everything reading as a solid, enclosed mass. I switched our own pantry storage to clear acrylic bins a while back, and beyond the practical benefit of easily seeing what needs restocking at a glance, the overall visual effect of the pantry area felt noticeably less heavy and enclosed once we made this change.
I’d recommend this option specifically for kitchens already feeling visually crowded or heavy, rather than as a universal recommendation regardless of a kitchen’s specific existing character, since the benefit here is largely about counteracting a sense of visual density that some small kitchens develop, particularly those with extensive solid, dark cabinetry throughout.
Consistent container sizing and shape across your clear storage matters considerably for this to genuinely look intentional rather than cluttered, I’d suggest choosing a coordinated set of bins specifically, rather than a mismatched assortment of whatever clear containers happen to be available, since visual consistency here reinforces the sense of order and lightness this particular storage choice is meant to achieve.
23. A Multi-Purpose Island on Locking Casters
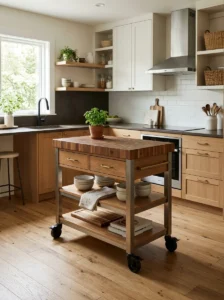
A small, genuinely mobile island, built on locking casters rather than fixed permanently to the floor, provides much of a traditional island’s functional benefit, additional counter space, storage, sometimes seating, while retaining the flexibility to be moved entirely out of the main floor space whenever that flexibility is genuinely needed. I designed one of these for a client’s small kitchen specifically because a fixed island simply wasn’t feasible given her room’s tight overall dimensions, and the mobile version let her enjoy an island’s benefits during actual cooking while still reclaiming that floor space for other uses at other times.
I’d recommend quality, properly rated locking casters specifically for this application, ensuring the island stays genuinely secure and stable once positioned for use, rather than shifting unexpectedly during actual cooking or food prep, which would undermine the whole point of having a stable, reliable additional work surface.
This solution offers considerably more flexibility than a fixed island installation, letting the same kitchen serve different needs at different times, additional prep and storage during active cooking, then reclaimed open floor space during cleanup or simply when the extra surface isn’t currently needed, a genuinely valuable adaptability that a small kitchen specifically benefits from in a way a larger, more spacious kitchen generally wouldn’t need to rely on nearly as much.
Final Thoughts
Every small kitchen I’ve genuinely enjoyed cooking in, my own included, achieved that success through thoughtful planning around actual daily use, not through any single dramatic renovation or expensive addition. The layouts and ideas that made the biggest real difference were almost always the ones that addressed a specific, genuine friction point, not enough counter space, awkward corner storage, too much walking between zones, rather than changes made purely because they looked impressive in a photo.
Before choosing any of these ideas for your own small kitchen, I’d suggest spending a few days genuinely paying attention to where you actually feel cramped or frustrated while cooking, which specific moments create friction, rather than assuming your kitchen simply needs to be bigger overall. More often than genuinely expected, a small kitchen’s real limitation isn’t its size, it’s how that limited space has been organized, and that’s something genuinely within reach to improve without ever needing to knock down a single wall.