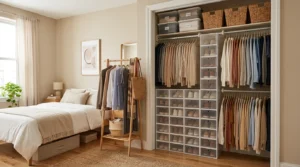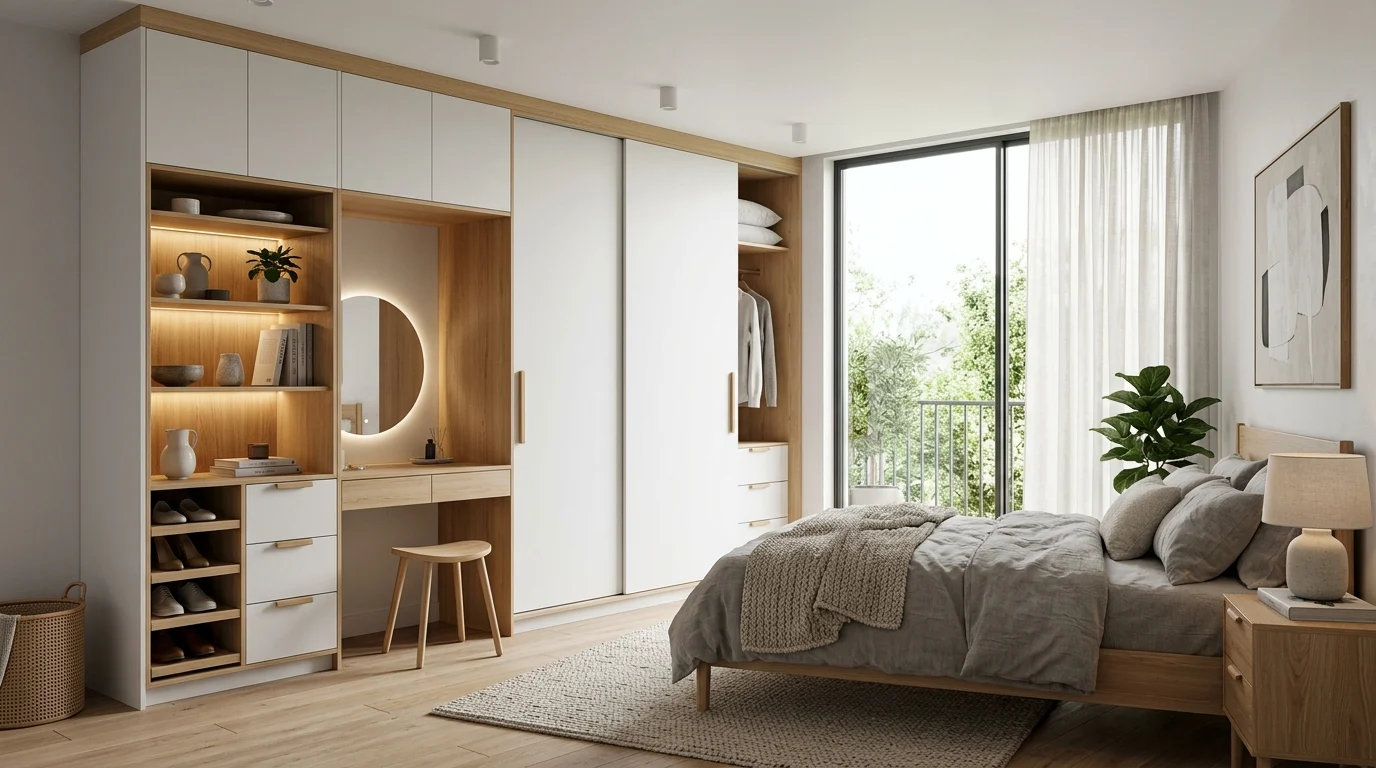
When we first moved into our current house, the bedroom came with a single, awkward built-in cupboard that was way too deep for hanging clothes and way too shallow for anything else. For almost a year, I lived out of stacked boxes on top of it because I genuinely didn’t know cupboards could be designed around how people actually store things, not just squeezed into whatever gap the room left behind. It wasn’t until I started researching and eventually redesigning that cupboard that I realized how much a well-planned storage unit changes daily life. You stop losing ten minutes every morning digging for a specific shirt, and the room instantly feels calmer just because things have a proper place.
Since then, I’ve helped redesign cupboards in three different homes, including my own, and picked up a lot of practical lessons along the way, some from things that worked beautifully, and a few from mistakes that cost extra time and money to fix. Below are 25 bedroom cupboard designs that balance style with genuinely smart storage, based on real experience rather than just what looks good in a photo.
1. Full-Height Sliding Door Wardrobe
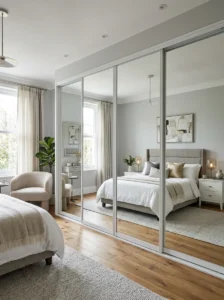
Sliding door wardrobes were the first upgrade I made in our own bedroom, mainly because our room was too narrow for a hinged door to open fully without hitting the bed. I didn’t expect how much of a difference this would make until I actually lived with it. Not needing that extra swing clearance meant we could push the bed a foot closer to the wall, which doesn’t sound like much, but it completely changed how the room felt to move around in.
Full-height sliding doors also make a room feel taller, since your eye travels all the way up without a visual break at the top of a shorter unit. I went with mirrored panels on two of the three sliding sections, which added the practical bonus of a full-length mirror without needing extra wall space for one separately.
The one thing I’d tell anyone considering this design is to invest in good-quality tracks. Our first set of tracks, chosen to save a bit of money, started sticking within eight months, and we ended up replacing the entire mechanism. A slightly more expensive, smooth-gliding track system is worth every extra rupee, since you’ll be opening and closing these doors multiple times a day for years. Sliding wardrobes work best in bedrooms with limited floor space, since they eliminate the need for door-swing clearance entirely.
2. Walk-In Style Open Wardrobe
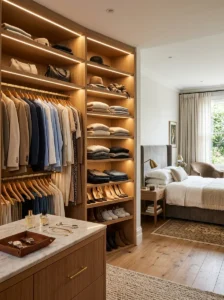
If your bedroom has enough depth, an open, walk-in style wardrobe without traditional doors creates a genuinely luxurious feel, even in a modestly sized room. I helped a friend design one in a spare room she converted, and the biggest surprise was how much easier getting dressed became when everything was visible at a glance instead of hidden behind doors.
The main concern people have with open wardrobes is dust, and it’s a valid one, especially in areas with a lot of construction dust or during dusty seasons. We addressed this by keeping frequently-worn clothes on open shelving and rails, while off-season or delicate items went into closed drawers or fabric storage boxes tucked into the lower sections. This hybrid approach gave us the open, boutique-like feel without sacrificing protection for clothes that weren’t in daily rotation.
Lighting is essential for this design to actually look good rather than cluttered. We added simple LED strip lighting along the top of the open shelving, which made the whole setup feel intentional and elevated rather than like clothes were just sitting out. I’d recommend this design specifically for bedrooms with decent square footage, since a cramped open wardrobe in a small room tends to look messy no matter how well it’s organized, simply because there’s less visual breathing room around it.
3. Built-In Cupboard with Study Nook
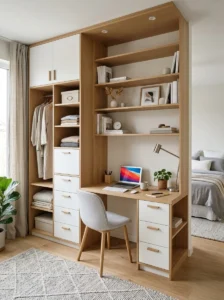
Built-In Cupboard with Study Nook, our most requested design combines a wardrobe with a small integrated desk, using space cleverly for bedrooms that double as a workspace. I tested this layout myself when I started working from home part-time, and having storage and a work surface built into a single unit meant I didn’t need to sacrifice an entire extra corner of the room for a separate desk.
The design works by breaking the cupboard run partway, leaving a gap roughly desk-height with a small work surface and open or drawer storage beneath it, then continuing the hanging and shelving sections on either side or above. In my case, we placed the desk section in the middle, flanked by hanging space on one side and drawers and shelving on the other, which kept the whole unit visually balanced rather than lopsided.
One practical lesson from setting this up: make sure the desk section gets adequate lighting and, ideally, is positioned near a window or at least away from the darkest corner of the room. My first attempt placed the desk nook in a dim corner, and I ended up needing an extra desk lamp just to make it usable during the day. If you work from home even occasionally, this hybrid design is one of the smartest ways to add function to a bedroom cupboard without needing more floor space.
4. Corner Wardrobe for Awkward Spaces
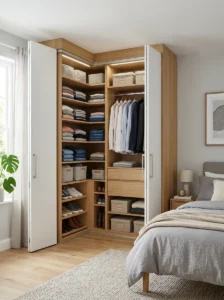
Corner wardrobes solve one of the most common bedroom layout problems I come across: an awkward, underused corner that’s too small for furniture but too large to just leave empty. I designed one for a client whose bedroom had an oddly angled corner from the building’s structure, and turning it into a functional wardrobe was genuinely one of the more satisfying projects I’ve worked on.
The key to a good corner wardrobe is the door mechanism. Standard hinged doors can be tricky in a corner because of clearance and angle issues, so we used a combination of a diagonal front panel with bifold doors, which opened smoothly without needing awkward extra space in front. This let us use nearly the entire corner depth for actual storage rather than losing space to door-swing requirements.
Internally, we angled the hanging rails and shelving to follow the corner’s shape rather than forcing a straight, rectangular layout inside an angled unit, which would have wasted a surprising amount of usable space. I’d genuinely recommend this design to anyone with an awkward corner in their bedroom rather than defaulting to leaving it empty or cluttering it with a random piece of furniture that doesn’t quite fit. It’s more work to plan properly, but the payoff in reclaimed storage space is significant.
5. Cupboard with Pull-Out Drawer Organizers
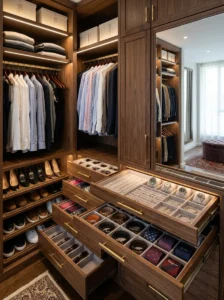
Pull-out drawer organizers changed how I think about cupboard storage entirely, and it’s one of the smallest upgrades on this list with one of the biggest impacts on daily convenience. Instead of deep, single-level drawers where things get buried and forgotten, these use internal dividers and pull-out trays specifically sized for folded clothes, accessories, or smaller items like jewelry and belts.
I retrofitted our own dresser drawers with simple fabric dividers first, before eventually upgrading to a proper cupboard section with built-in pull-out organizers when we redid the room. The difference was immediate. I could actually see everything in a drawer at a glance instead of digging through a pile, and folded t-shirts stayed folded instead of collapsing into a jumbled heap within a week of putting them away.
The practical tip I’d pass on here is to measure your most-used items before choosing organizer sizes, standard dividers don’t always match the width of local clothing sizes or accessory shapes, and getting custom-sized inserts made a noticeable difference for us. Pull-out organizers work particularly well combined with soft-close drawer mechanisms, since the two together make the entire cupboard feel more premium and considered, even if the rest of the design is fairly simple. This is a great upgrade for anyone renovating on a budget, since you can add these organizers to existing drawers without replacing the whole unit.
6. Floor-to-Ceiling Storage Wall
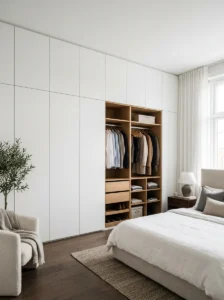
A floor-to-ceiling storage wall essentially turns one entire wall of the bedroom into cupboard space, maximizing every inch of vertical storage rather than leaving the upper section as wasted, hard-to-reach space. I saw this done in a friend’s apartment where the bedroom was quite small, and it made the room feel far more organized than its square footage would normally allow.
The trick to making this design work visually is keeping the doors flush and using a single, consistent color or finish across the entire wall, so it reads as one clean architectural feature rather than a cluttered wall of individual cupboards. My friend used matte white doors with minimal, recessed handles, which made the whole wall almost disappear visually, letting the rest of the room’s decor stand out instead.
For the upper sections that are harder to reach, we designated those areas for off-season storage, extra bedding, suitcases, items you don’t need daily. The lower and middle sections stayed reserved for everyday clothing and accessories. This vertical zoning is something I’d recommend to anyone considering a similar design, since without a clear plan for what goes where, the higher shelves tend to become a dumping ground for things you forget you own. A small step stool tucked discreetly nearby makes accessing the top sections far more practical day to day.
7. Cupboard with Integrated Dressing Table
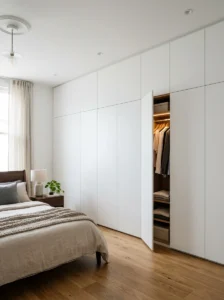
Combining a dressing table into the cupboard structure itself is a design I’ve grown to really appreciate, particularly in bedrooms where floor space is tight. I helped set this up for my sister, whose room couldn’t comfortably fit both a separate dressing table and a full wardrobe without feeling cramped.
The layout works similarly to the study nook design, breaking the cupboard run to leave a desk-height section, but this one is specifically outfitted with a mirror, often with integrated lighting, and shallow drawers sized for makeup, jewelry, and smaller accessories rather than folded clothes. We positioned small pull-out trays with velvet lining for jewelry, which kept everything visible and untangled instead of thrown into a single messy drawer, a problem my sister had struggled with for years before this redesign.
Lighting around the mirror makes a genuinely significant difference here. We added warm LED strips on either side of the mirror rather than relying on the room’s main overhead light, since side lighting reduces harsh shadows on the face far better than overhead lighting alone. This is a detail that’s easy to overlook during planning but makes a noticeable difference in how functional and pleasant the dressing area actually feels to use every morning. For anyone tight on space, this integrated approach is far more efficient than trying to fit two separate furniture pieces into one room.
8. Cupboard with Open Shelving Display
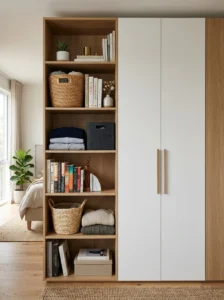
Not every section of a bedroom cupboard needs to be hidden behind doors. Open shelving, whether as a small section within a larger closed unit or as a standalone display area, adds visual interest and a place to showcase items you actually want to see rather than store away. I incorporated a few open shelves into my own wardrobe redesign specifically for folded sweaters and a small collection of books, and it broke up what would have otherwise been a very flat, uniform wall of doors.
The key lesson here is intentionality. Open shelving looks great when it’s curated, folded items in matching colors, a few decorative pieces, plants, or books arranged thoughtfully. It looks cluttered fast when it becomes a catch-all for whatever doesn’t fit elsewhere. I had to consciously edit what went on our open shelves more than once after they started creeping toward looking messy rather than styled.
I’d recommend limiting open shelving to no more than a third of the total cupboard width, keeping the majority of storage behind closed doors for less visually organized items like everyday clothing. This balance gives you the decorative benefit of open shelving without turning the whole wardrobe into something that requires constant tidying to look presentable. Adding a couple of woven baskets to open shelves is also a practical trick for containing smaller items that would otherwise look messy sitting directly on the shelf.
9. Minimalist Handleless Cupboard
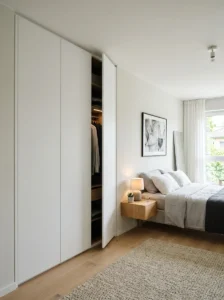
Handleless cupboards, where doors open via a push-to-open mechanism or a discreet recessed groove instead of visible handles, have become one of my favorite design choices for a clean, modern bedroom look. I switched our own wardrobe doors to a push-to-open system during our last renovation, and the difference in how sleek and uncluttered the room looked afterward genuinely surprised me.
Beyond the visual benefit, there’s a practical one too, no handles means nothing snagging on clothing or bags as you walk past, which was a small but recurring annoyance with our old handled doors. The recessed groove style, where a horizontal channel is cut into the top of each door for fingers to grip, is a slightly more budget-friendly alternative if a full push-to-open mechanism feels like too big an investment.
The one honest downside I’d mention is that push-to-open mechanisms can wear out faster than traditional hinges and handles if you choose a lower-quality version, and repairs can be trickier since the mechanism is hidden inside the door. I’d recommend spending a bit more on a reputable brand for this specific hardware, since it’s genuinely one area where cutting corners shows up as a real inconvenience within a year or two. For anyone drawn to minimalist interiors, though, the visual payoff of a handleless cupboard wall is hard to match with any other design choice.
10. Cupboard with Built-In Laundry Hamper
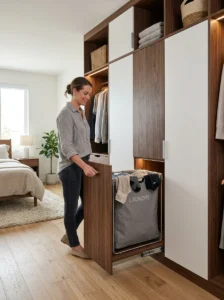
Integrating a pull-out laundry hamper directly into the cupboard structure is a small design choice that ended up making a bigger daily difference than I expected. We added one to a lower section of our wardrobe specifically to stop the growing pile of clothes that used to accumulate on our bedroom chair, which, if I’m honest, had basically become an unofficial second hamper for years.
The design typically uses a pull-out frame with a removable fabric liner, making it easy to lift the whole bag out and carry it directly to the washing machine rather than transferring items individually. We positioned ours at a lower level within easy reach, since a hamper placed too high defeats the purpose of making laundry disposal genuinely convenient day to day.
One practical tip from experience: choose a hamper section with reasonable ventilation, either through slatted panel doors or a gap at the base, rather than a fully sealed compartment. Fully enclosed hampers can develop a musty smell over time, especially in humid climates, since damp clothes need some airflow rather than sitting in a completely sealed space. This is a small addition in terms of construction, but it genuinely reduces visual clutter elsewhere in the bedroom, which is exactly the kind of small, practical win that makes a big difference in how tidy a room feels day to day.
11. Two-Tone Color Block Cupboard
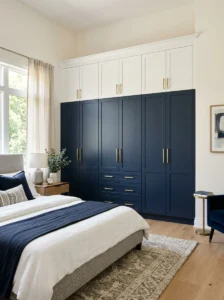
Two-tone cupboards, where the upper and lower sections use contrasting colors or finishes, bring a design-forward look to what could otherwise be a purely functional piece. I tried this in a guest bedroom, pairing a deep navy lower section with a warm white upper section, and it added a genuinely custom, boutique feel that a single flat color simply wouldn’t have achieved.
The general rule I follow with two-tone cupboards is keeping the darker color on the bottom and lighter on top. This mimics how furniture naturally reads visually, grounded and stable at the base, lighter and airier as it rises, and tends to look more balanced than the reverse. I did experiment with flipping this in one design, and while it wasn’t wrong exactly, it read as slightly less cohesive than the traditional arrangement.
Hardware choice matters more than people expect with two-tone designs. We used matte black handles throughout, which tied the two colors together as a single cohesive piece rather than looking like two mismatched sections stacked on top of each other. I’d recommend sticking to one handle finish across the whole unit even when using contrasting door colors, since mixing hardware finishes on top of already-contrasting colors tends to look busy rather than intentional. This design works particularly well in bedrooms that want a bit more personality than an all-neutral room without going fully bold with a single saturated color.
12. Cupboard with Vertical Shoe Racks
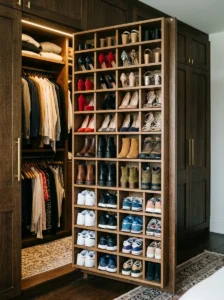
Shoe storage is something that gets overlooked in a lot of cupboard designs, often reduced to a random shelf or, worse, a pile on the closet floor. I made this mistake myself for years until I finally had angled, vertical shoe racks built into one section of our wardrobe, and it’s honestly one of the upgrades I recommend most enthusiastically to anyone redesigning their storage.
The angled slat design lets shoes sit at a slight incline rather than flat, which does two things: it fits significantly more pairs into the same vertical space compared to flat shelving, and it makes each pair visible at a glance rather than stacked and hidden. Before this upgrade, I regularly forgot I owned certain shoes simply because they were buried under others on a flat shelf.
I’d recommend measuring your actual shoe collection, including bulkier items like sneakers or boots, before finalizing rack spacing, since standard rack dimensions don’t always account for larger shoe sizes or chunkier styles. We had to request a slightly adjusted spacing for one section to accommodate a few pairs of sneakers that didn’t fit the standard slot depth. For anyone with a growing shoe collection, dedicating a proper vertical section for this rather than treating it as an afterthought makes a genuinely significant difference in how organized the entire cupboard feels.
13. Cupboard with Frosted Glass Panels
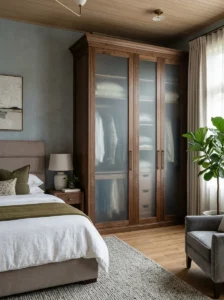
Frosted glass door panels bring a softer, more elegant look to a bedroom cupboard compared to solid doors, while still concealing the contents enough to keep things looking tidy without full visibility. I used frosted glass on the upper sections of a client’s wardrobe, keeping the lower sections in solid wood-finish panels, and the combination felt light and sophisticated in a way that an all-solid design hadn’t achieved in earlier drafts.
The practical advantage of frosted glass, beyond aesthetics, is that it lets you glimpse a general sense of what’s stored where without needing labels or opening every section to check. It’s a subtle organizational aid that solid doors simply can’t offer. That said, frosted glass does show smudges and fingerprints more readily than solid finishes, something I hadn’t fully anticipated until living with it for a few months.
I’d recommend this design specifically for upper sections that see less frequent hands-on contact, like folded off-season items or extra linens, rather than lower sections that get opened and closed multiple times daily, where fingerprint marks become a more constant maintenance issue. Pairing frosted glass with slim metal or wood framing rather than a completely frameless design also helps the panels feel more substantial and less prone to looking flimsy over time. It’s a lovely middle ground for anyone who wants more visual softness than solid doors but isn’t ready for fully open shelving.
14. Cupboard with Under-Bed Storage Extension
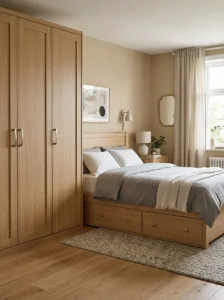
While not technically part of the cupboard structure itself, designing cupboard storage in coordination with under-bed drawers creates a genuinely cohesive storage system rather than treating each piece of furniture in isolation. I planned this combination in our own bedroom, using matching finishes on both the wardrobe and a set of custom under-bed drawers, and the visual continuity made the whole room feel more considered and less like separately purchased furniture pieces.
The practical benefit goes beyond aesthetics, though. We designated the under-bed drawers specifically for bulkier, less frequently accessed items, extra blankets, off-season bedding, and storage bags for out-of-season clothing, freeing up the actual cupboard for daily-use items exclusively. This division meant our main wardrobe never felt overstuffed, since the bulkiest, least-used items had their own dedicated space entirely separate from everyday clothing storage.
If you’re considering this combination, I’d recommend choosing under-bed drawers with smooth, sturdy castors rather than a fixed drawer that requires lifting the mattress or bed frame to access. We learned this lesson after our first set used a stiff, sticking mechanism that made us avoid using the drawers altogether within a few months, defeating the entire purpose of the extra storage. A well-functioning, easy-glide drawer system genuinely gets used regularly, while a clunky one tends to become forgotten storage, exactly the outcome you’re trying to avoid.
15. Cupboard with Integrated Lighting
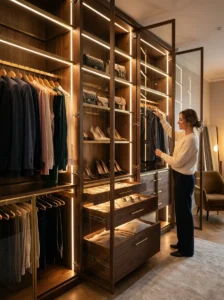
Adding lighting inside the cupboard itself, whether motion-activated LED strips or simple battery-powered puck lights, is a relatively small upgrade that makes a surprisingly large difference in daily usability, particularly for cupboards in rooms with limited natural light or for early morning and late evening use. I retrofitted motion-sensor LED strips into our wardrobe a couple of years ago, and I genuinely can’t imagine going back to fumbling for clothes in a dim closet.
The motion-sensor feature specifically is worth the small extra cost over basic always-on lighting. Lights that automatically switch on when you open the door and off when you close it mean you never have to think about turning them on or worry about batteries draining because a light was accidentally left on. This small automation removes one more tiny daily friction point, exactly the kind of detail that makes a storage space feel genuinely well-designed rather than just functional.
I’d recommend positioning lighting along the top of each section rather than just at the very top of the whole unit, since a single light source at the top often leaves lower shelves and drawers in shadow, somewhat defeating the purpose. Warm-toned LEDs, rather than cool white, also make it easier to judge clothing colors accurately when getting dressed, an issue that cooler lighting can genuinely distort. This upgrade is inexpensive relative to its impact and works well as a retrofit even on cupboards you’re not otherwise renovating.
16. Cupboard with Mixed Material Finishes
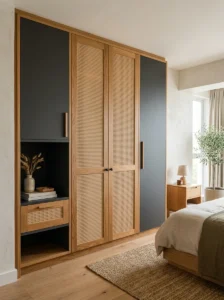
Combining different materials within a single cupboard design, like matte wood-finish doors alongside a section of woven rattan or textured fabric panels, adds visual richness that a single uniform finish can’t achieve on its own. I incorporated rattan panel inserts into two of the upper cabinet doors during our last redesign, and it softened what had otherwise felt like a fairly plain, boxy wardrobe wall.
The key to making mixed materials work is restraint. I’d recommend limiting yourself to two, at most three, distinct materials or finishes within a single cupboard design, since too many competing textures can start to look chaotic rather than intentional. In our case, we stuck with the primary wood-finish doors, rattan accent panels, and matte black hardware, a simple three-element palette that felt cohesive rather than busy.
Practically speaking, textured materials like rattan or cane require a bit more care than smooth finishes, they can catch dust in their weave and need occasional gentle cleaning with a soft brush rather than just a wipe-down. I’d also suggest using these textured materials on upper or less frequently touched sections rather than areas that get handled constantly, since delicate woven materials can wear faster with heavy daily contact. Used thoughtfully, though, mixed materials are one of the most effective ways to make a built-in cupboard feel custom and considered rather than like a standard, mass-produced unit.
17. Cupboard with Hidden Safe Compartment
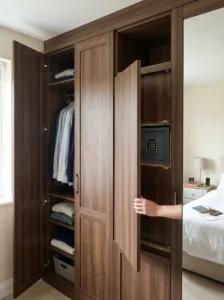
For anyone wanting a discreet spot for valuables, jewelry, important documents, or anything you’d rather not have visible, a hidden safe compartment built into the cupboard structure is a practical addition that doesn’t compromise the room’s overall look. I helped design one for a family member, tucked behind a false back panel in one of the lower cabinet sections, completely invisible unless you knew exactly where to look.
The design itself is fairly simple in concept: a small, sturdy lockbox or safe unit installed within the cupboard’s structure, concealed behind a panel that appears identical to the surrounding cabinetry. We used a panel that popped open via a discreet magnetic catch rather than an obvious handle or lock, which kept it genuinely unnoticeable to anyone unfamiliar with the design.
I’d recommend consulting with your carpenter or cupboard installer early in the planning process if you want this feature, since retrofitting a hidden compartment into an already-built cupboard is far more difficult and often less seamless-looking than incorporating it from the start. It’s also worth considering the compartment’s exact placement carefully, low enough to be discreet, but not so awkwardly positioned that accessing it becomes a genuine hassle every time you need something from it. This is a small, thoughtful addition that adds real peace of mind without any visible compromise to the cupboard’s design.
18. Cupboard with Matching Ceiling Trim
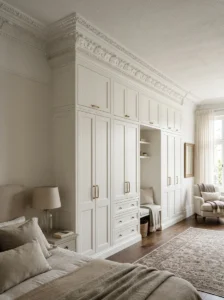
One detail that elevated our own cupboard from looking like a standalone furniture piece to feeling like a genuine architectural feature of the room was extending matching trim or molding from the top of the cupboard along the adjoining ceiling line. It’s a subtle touch, but it visually integrates the cupboard into the room’s structure rather than leaving it looking like something simply placed against the wall afterward.
We used a simple, slim crown molding painted in the same finish as the cupboard doors, running along the ceiling where the top of the wardrobe met the wall. The effect was similar to a built-in bookshelf you’d see in older, more traditionally crafted homes, giving our fairly standard wardrobe a custom, architecturally intentional feel for a relatively small additional cost.
This detail works particularly well with full-height, floor-to-ceiling cupboard designs, since there’s no visible gap between the top of the unit and the ceiling for the trim to bridge. For cupboards that don’t reach the ceiling, this specific technique won’t apply as neatly, though you could consider similar trim detailing around the cupboard’s front face instead to achieve a comparable sense of intentional, built-in design. It’s a small finishing touch, but it’s consistently one of the details people notice and comment on when they see our bedroom for the first time.
19. Cupboard with Adjustable Modular Shelving
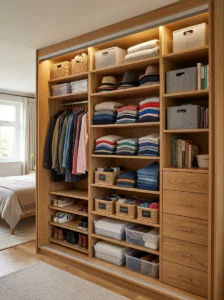
Fixed shelving might look tidy on installation day, but I learned fairly quickly that our actual storage needs shifted over time, more shoes one year, more folded sweaters the next, and a fixed layout simply couldn’t adapt. Switching to an adjustable, modular shelving system within our wardrobe, using pegs and repositionable shelf brackets, solved this problem entirely and is a feature I’d genuinely recommend prioritizing in any new cupboard design.
The system works by installing a series of evenly spaced peg holes along the interior side panels, allowing shelves to be moved up, down, or removed entirely as your storage needs change, without any tools or professional help required. When our storage needs shifted after a seasonal wardrobe change, I was able to reconfigure an entire section in about ten minutes, something that would have required a carpenter and significant cost with a fixed shelving design.
I’d recommend this feature especially for anyone whose storage needs are likely to change over time, growing families, people whose wardrobes shift seasonally, or anyone who simply isn’t fully certain yet exactly how they want every section organized. The small additional cost of installing an adjustable system upfront is minor compared to the cost and hassle of modifying fixed shelving later, and the flexibility has genuinely proven valuable every single time our storage needs have shifted since we made the switch.
20. Cupboard with Contrasting Interior Color
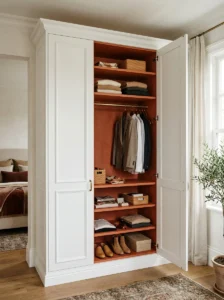
While the outside of a cupboard tends to get most of the design attention, painting or finishing the interior in a contrasting color is a small detail that adds an unexpectedly delightful touch every time you open the doors. We used a deep, warm terracotta on the interior back panels of our otherwise neutral white wardrobe, and it turned a purely functional moment, opening the closet, into a small, pleasant surprise every time.
This design choice doesn’t affect the room’s overall look from the outside, since the contrasting color is only visible when the doors are open, which makes it a wonderfully low-risk way to experiment with a bold color you might not be confident committing to on a full, visible wall. If your taste changes down the line, repainting the interior of a cupboard is also a far smaller, less disruptive project than repainting an entire room.
I’d recommend choosing a color that complements your bedroom’s existing palette rather than something jarring or completely unrelated, so the moment of opening the cupboard feels like a natural extension of the room rather than a strange, disconnected surprise. This detail costs very little to implement, especially if you’re already having the cupboard built or renovated, and it’s consistently one of the small design choices that guests and visitors genuinely notice and ask about.
21. Cupboard with Built-In Charging Station
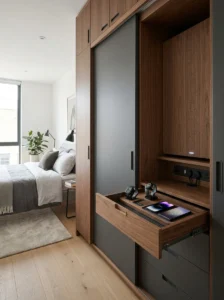
With how many devices most households now manage, phones, tablets, smartwatches, building a small dedicated charging station directly into a cupboard section has become one of the more genuinely useful modern additions I’ve incorporated into recent designs. We built a small drawer with a discreetly routed outlet and cable pass-through into our own wardrobe, giving devices a dedicated spot to charge overnight without cluttering the nightstand.
The design is fairly simple: a shallow drawer or open cubby with an outlet installed inside, along with a small cutout or grommet for cables to pass through neatly rather than being visible or tangled outside the drawer. This keeps charging cables and devices completely out of sight during the day while still being fully functional and accessible when needed.
I’d suggest coordinating this feature with an electrician early in the cupboard’s planning phase, since retrofitting a safely wired outlet into an existing built-in cupboard is considerably more complicated than including it in the original design and construction. It’s a small, modern convenience that doesn’t affect the cupboard’s overall aesthetic in any noticeable way, but it removes a small daily annoyance that a lot of households deal with without even realizing there’s a simple built-in solution available.
22. Cupboard with Slatted Wood Door Panels
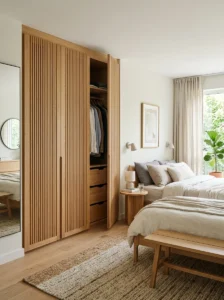
Slatted wood panels bring warmth and texture to a bedroom cupboard, and they’ve become a design element I find myself recommending more and more, particularly for bedrooms leaning toward a natural, earthy aesthetic. I used slatted oak-finish panels on the lower half of a client’s wardrobe, paired with solid matte panels above, and the combination added genuine visual interest to what would have otherwise been a fairly plain, flat cupboard front.
Beyond the aesthetic appeal, slatted panels offer a practical benefit: subtle ventilation. Unlike fully solid doors, the small gaps between slats allow a degree of airflow into the cupboard, which can help reduce musty odors, particularly useful in sections storing shoes or in bedrooms located in more humid climates. This wasn’t actually our original motivation for choosing the design, but it turned out to be a genuinely appreciated side benefit once we’d been living with it for a while.
One practical consideration: slatted panels do require slightly more careful cleaning than flat surfaces, dust can accumulate in the grooves between slats more than on a smooth door front. A soft brush attachment on a vacuum, used every few weeks, keeps this manageable without becoming a real chore. For anyone drawn to a warmer, more textured look than standard flat-panel cupboards, slatted wood is a design choice that photographs beautifully and holds up well in person too.
23. Cupboard with Statement Brass Hardware
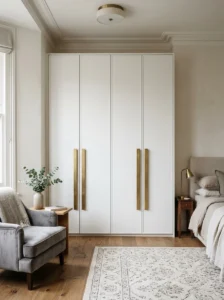
Sometimes the simplest upgrade makes the biggest visual difference, and swapping standard cupboard hardware for statement brass handles and knobs is a perfect example. I did this on an otherwise plain, builder-grade wardrobe in a rental property, and the transformation from generic to genuinely stylish, achieved with just a hardware swap, was honestly one of the best value-for-money upgrades I’ve made in any home.
The key to making this work is consistency and proportion. I chose slightly oversized, elongated brass pulls rather than small, standard knobs, which gave the cupboard a more substantial, boutique-hotel feel rather than looking like a minor accessory change. Matching the hardware finish throughout the entire unit, rather than mixing brass with the existing chrome elsewhere in the room, made the upgrade feel intentional and cohesive rather than piecemeal.
This is one of the most budget-friendly changes on this entire list, since it doesn’t require structural changes, professional installation in most cases, or significant expense, just unscrewing the old hardware and installing new pulls, often within an afternoon. I’d genuinely recommend this as a starting point for anyone wanting to update a bedroom cupboard’s look without committing to a full renovation, especially in rental properties where bigger structural changes aren’t an option but small, reversible upgrades like hardware swaps absolutely are.
24. Cupboard with Dedicated Accessory Wall
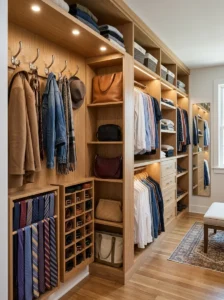
For anyone with a significant collection of belts, ties, scarves, or bags, dedicating a specific section of the cupboard to accessory storage, using hooks, narrow shelves, and pull-out racks, makes a genuinely significant organizational difference compared to lumping accessories in wherever there happens to be spare space. I set this up in our own wardrobe after realizing I owned considerably more scarves and bags than I’d ever accounted for in the original storage plan.
We used a combination of a pull-out belt and tie rack, a row of small hooks for bags, and narrow vertical dividers for folded scarves, all consolidated into a single dedicated section roughly two feet wide. Having everything accessory-related in one predictable spot meant I stopped searching multiple drawers and shelves every time I needed a specific bag or scarf, a small but genuinely time-saving change to my daily routine.
I’d recommend actually counting or estimating your accessory collection honestly before finalizing this section’s size, it’s easy to underestimate how much you’ve accumulated over the years, and an undersized accessory section defeats the purpose almost immediately. If you’re unsure, err slightly larger than you think you need; it’s much easier to leave a section partially empty than to run out of space within the first few months of using a newly organized cupboard.
25. Fully Custom Made-to-Measure Cupboard
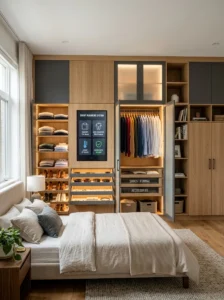
My final recommendation isn’t a specific style but an approach: working with a carpenter or joiner to design a fully custom, made-to-measure cupboard rather than adapting a standard, off-the-shelf unit to fit your space. Every design on this list can technically be achieved with either approach, but after living with both in different homes, the difference in how well a custom unit actually fits your specific room and habits is significant.
When we finally invested in a fully custom wardrobe for our current bedroom, the carpenter measured not just the wall dimensions but asked detailed questions about our actual clothing collection, how many hanging items versus folded, shoe collection size, accessory storage needs, before finalizing the internal layout. This level of detail meant every section of the finished cupboard actually matched how we live, rather than us adjusting our habits to fit a generic, pre-designed layout.
I’ll be honest that custom cupboards cost more upfront than ready-made units, and the process takes longer, usually several weeks between measuring, design approval, and installation. But for a piece of furniture you’ll use multiple times every single day for years, the investment consistently proves worthwhile in my experience. If budget allows, even a partially custom approach, a ready-made frame with custom interior organization, offers a solid middle ground between full customization and an off-the-shelf solution.
Final Thoughts
Looking back at every cupboard redesign I’ve been part of, the projects that turned out best always started with an honest look at how we actually live, not just what looked good in inspiration photos. Before choosing any of these designs, take a few days to genuinely observe your own habits: what do you reach for daily, what gets shoved to the back and forgotten, where does clutter tend to accumulate.
A beautiful cupboard that doesn’t match how you actually store and access your belongings will frustrate you within months, no matter how stylish it looks on installation day. Start with function, then layer in the style choices from this list that genuinely fit your space and your budget. That order, in my experience, is what separates a cupboard you love using every day from one that just looks good in photos.