A few years ago, after a trip to Japan where we stayed in a small ryokan with a traditional soaking tub, I came home completely obsessed with recreating even a fraction of that calm, deliberate bathing experience in our own home. Our bathroom at the time was fairly standard, a builder-grade tub and shower combo, bright white tile, and harsh overhead lighting that made even a relaxing evening shower feel more clinical than restorative. The contrast between that stark, functional space and the deep, quiet stillness of the ryokan bath stuck with me for months afterward.
What I eventually realized, after a fair amount of research and a slower-than-expected renovation process, is that Japanese-inspired bathroom design isn’t really about copying specific materials or fixtures wholesale, it’s rooted in a set of principles: natural materials, restrained color, deliberate lighting, and a genuine sense of ritual around bathing rather than treating it as a purely functional task. Once I understood that underlying philosophy, I was able to translate it into our own space in ways that fit our home, budget, and climate, without needing an authentic imported soaking tub or a full structural overhaul.
Since finishing that renovation, I’ve helped a friend apply similar principles to her own smaller bathroom, and I’ve picked up a much clearer sense of which elements genuinely capture that zen, spa-like feeling versus which ones just look nice in photos without translating to a truly calming daily experience. Here are 13 Japanese-style bathroom ideas I’ve personally used, tested, or researched thoroughly enough to recommend with confidence.
What Makes a Bathroom Feel Genuinely “Japanese-Inspired”
Before diving into specific ideas, it helps to understand that traditional Japanese bathing culture separates washing from soaking, you clean yourself thoroughly before ever entering the tub, which stays reserved purely for relaxation rather than getting clean. This distinction shapes a lot of the design choices that follow, from separate washing and soaking zones to the materials chosen for each. In my own renovation, embracing this philosophy, rather than just borrowing a few aesthetic details, ended up being the real key to making the space feel authentically calming rather than simply “Japanese-inspired” in name only.
1. Install a Deep Soaking Tub (Ofuro-Style)
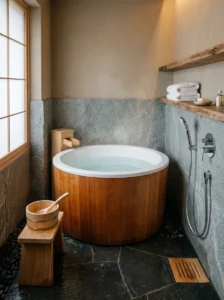
The single most transformative addition to our bathroom was a deep, compact soaking tub modeled after a traditional Japanese ofuro. Unlike a standard Western tub, which is long and shallow, an ofuro-style tub is shorter but considerably deeper, designed for sitting upright with the water reaching your shoulders rather than lying flat. This required a slightly smaller footprint than our old tub, which actually worked in our favor given our bathroom’s modest size, freeing up floor space elsewhere in the room that we later used for the small stool and pebble tray mentioned further down this list. The experience of soaking in water up to my shoulders, rather than the shallower coverage of a standard tub, genuinely changed how relaxing that evening ritual felt, it’s a noticeably different physical sensation, more enveloping and calming than I expected going in, almost like the water itself is doing more of the work to help you unwind.
We chose a tub made from a warm-toned acrylic designed to mimic hinoki cypress wood, since authentic hinoki tubs, while beautiful and prized for their natural fragrance, require more specialized maintenance and a considerably higher budget than we were prepared to commit to for this particular renovation. Even the acrylic version, chosen specifically for its warm tone and rounded profile, brought a noticeably different feel to the room compared to our old rectangular tub, and it’s become the genuine centerpiece of the whole design. Sizing this correctly took some careful measuring, since these tubs are sold in a range of depths and diameters, and I’d strongly recommend sitting in a floor model if a local showroom carries one, since the seated proportions can feel surprisingly different from person to person depending on height. We also had to confirm our existing plumbing could handle the tub’s water volume efficiently, since filling a deep soaking tub takes noticeably longer than a shallow standard one, a detail that’s easy to overlook until you’re standing there waiting for the water level to rise on that first evening soak.
2. Create a Separate Wet and Dry Zone
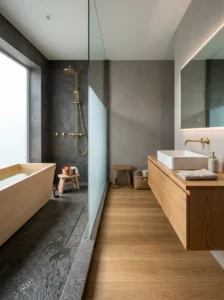
Traditional Japanese bathrooms physically separate the washing and showering area from the drier zones of the room, often with a slight step down or a glass partition, which keeps water contained to one section rather than splashing across the whole space. We implemented a simplified version of this by adding a frameless glass partition between our shower and soaking tub area and the vanity, along with a slightly sloped, water-resistant floor in the wet zone that drains toward a central point rather than pooling in corners the way our old bathroom occasionally did after a longer shower.
This wasn’t a small undertaking, it required reworking some of our existing plumbing and flooring, but the practical benefit has been significant beyond just the aesthetic authenticity. Our vanity area now stays dry and functional even right after someone showers or soaks, which has genuinely reduced the daily maintenance hassle of mopping up splashed water that used to accumulate near our old sink. We also added a small threshold strip between the two zones, low enough not to create a tripping hazard but distinct enough to visually and physically separate the wet zone from the rest of the room. Beyond the practical upside, this separation also reinforces the sense of ritual central to Japanese bathing culture, you move through a clear washing phase before transitioning into the calmer, dedicated soaking area, which has subtly changed how unhurried our evening routine feels compared to our previous all-in-one wet room setup where everything happened in the same undivided space without any real sense of transition between tasks. We also noticed an unexpected side benefit once the two zones were separated, our bathroom fan now has an easier time managing humidity overall, since moisture stays more concentrated in the designated wet zone rather than spreading evenly across the entire room, which has reduced the amount of condensation we used to see building up on the mirror and vanity surfaces after a hot shower.
3. Use Natural Wood Accents Throughout
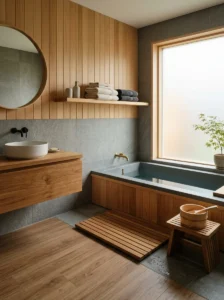
Warm wood tones are central to the Japanese bathroom aesthetic, offsetting the coolness of tile, stone, and water with something organic and tactile. We incorporated a teak bath mat, a small wood stool for washing while seated (a traditional element of Japanese bathing), and wood-look tile flooring in the drier zone of the room. Real wood in a bathroom setting requires careful selection, since not every wood species tolerates consistent moisture well, teak and cedar are popular choices specifically because of their natural water resistance, and we made sure to choose products rated for wet environments rather than repurposing standard indoor furniture that would likely warp or develop mold within a matter of months.
The wood elements have made an outsized difference in how warm and inviting the room feels compared to our old all-tile setup, softening what could otherwise be a fairly hard, cold material palette dominated by stone and glass. I’d recommend starting with smaller wood accents, a stool, a mat, a small shelf, if you’re hesitant to commit to a larger wood installation right away, since even these modest additions noticeably shift the room’s overall warmth without requiring a full renovation budget. We’ve also found that oiling the teak pieces every few months, a simple maintenance step that takes only a few minutes, has kept them looking rich and well cared for rather than dried out or faded, which is worth factoring into your ongoing routine if you decide to bring real wood into a space that sees regular moisture exposure. For anyone worried about the upkeep involved, I’d point out that the actual time commitment is fairly minimal, a quick wipe-down with teak oil applied with an old cloth, done roughly once every couple of months, has been enough to keep our pieces looking as good as the day we installed them, without requiring any specialized tools or professional maintenance service.
4. Choose a Muted, Earthy Color Palette
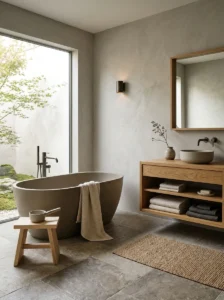
Japanese-inspired bathrooms tend to favor soft, muted, earthy tones, warm grays, soft taupe, deep charcoal, over bright whites or bold colors. We repainted our walls a soft warm gray and chose a matching stone-look tile in a similarly muted tone, moving away from the stark, bright white that had previously dominated the room. This shift alone did a lot of quiet work toward the calmer feeling we were after, since bright white surfaces, while clean-looking, can actually feel somewhat sterile and energizing rather than soothing, which works against the restful mood central to this design style.
I’d recommend testing paint and tile samples together under your bathroom’s actual lighting before committing, since muted tones can shift more noticeably under different light temperatures than bolder colors might, and getting the exact right level of warmth versus coolness in your chosen palette makes a real difference in how successfully the room reads as calm rather than simply gray and flat. We went through three different gray swatches before landing on the final shade, taping each one to the wall for several days and observing how it looked in the morning, midday, and evening light before making our final decision. It’s a small extra step that takes patience, but given how much of the room’s overall mood rests on this color choice, I’ve found it’s worth resisting the urge to rush the decision just to move the renovation forward faster. This same patience paid off with our tile selection as well, since we brought home samples of three different stone-look tiles before settling on the final choice, laying each one flat on the bathroom floor under natural daylight to see how it actually read against the wall color we’d already committed to, rather than relying purely on how the small sample chip looked in isolation at the store.
5. Add a Small Rock Garden or Pebble Accent
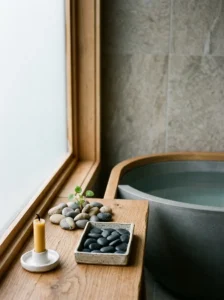
A small tray or recessed area filled with smooth river rocks or pebbles, sometimes placed near the tub or along a windowsill, brings a subtle nod to traditional Japanese rock gardens into the bathroom. We added a shallow ceramic tray filled with smooth black pebbles on our windowsill, occasionally placing a single small plant or a lit candle among them. It’s a small, low-cost detail, but it’s added a genuine sense of intentional, curated calm to that corner of the room, something that catches my eye every time I walk past even though it takes up almost no actual space.
If you want a slightly more elaborate version, some homeowners incorporate a small in-floor pebble border around the tub itself, though this requires more substantial waterproofing and construction work than the simple tray option we went with, so it’s worth weighing the visual payoff against the added complexity and cost involved before committing to that more ambitious approach. We sourced our pebbles from a local garden supply store rather than a home decor retailer, since the bulk pricing was considerably more affordable, and rinsing them thoroughly before use removed any dust or debris that might otherwise have clouded the tray’s appearance once placed in the room. If you’re drawn to this idea but hesitant about the more involved in-floor version, I’d suggest starting exactly the way we did, with a simple, inexpensive tray, and living with it for a while before deciding whether the look and feel is worth the extra investment of a more permanent installation. In our case, the small tray version has been entirely satisfying on its own, and after several years I still haven’t felt the need to upgrade to anything more elaborate, which suggests that the simpler option can genuinely deliver most of the intended calming effect without the added complexity.
6. Incorporate Bamboo Elements
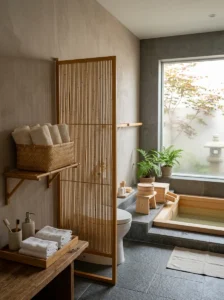
Bamboo, whether in the form of a small woven basket, a bath mat, or decorative screening, adds another layer of natural texture that pairs beautifully with the wood and stone already present in a Japanese-inspired bathroom. We added a bamboo storage basket for rolled towels and a small bamboo screen partially obscuring the toilet area, both practical additions that also reinforce the overall aesthetic without requiring any construction or plumbing changes to install.
Bamboo tends to hold up reasonably well in humid bathroom conditions, particularly varieties treated for water resistance, though I’d still recommend keeping bamboo pieces away from direct, constant water exposure like inside the shower itself, reserving it instead for drier zones or areas that see occasional rather than constant moisture. We chose a natural, untreated finish rather than a stained or lacquered bamboo, since the raw material’s texture and slight color variation felt more in keeping with the organic, understated quality we were going for throughout the rest of the room. It’s also worth noting that bamboo pieces tend to be relatively inexpensive compared to some of the other materials on this list, making them an easy, low-risk way to start introducing this design style into a bathroom without a significant financial commitment upfront. We’ve since added a second, smaller bamboo tray near the vanity for holding hand towels, and the consistency of material across a few different functional pieces throughout the room has helped tie the whole space together visually, even though each piece serves a completely different practical purpose. If you’re just beginning to experiment with this style, I’d suggest starting with one or two bamboo pieces in easily replaceable spots, like a basket or a small tray, before committing to anything more structural like a full screen installation, since this lets you gauge how the material holds up in your specific bathroom’s humidity levels first.
7. Use Frosted or Textured Glass for Privacy Without Losing Light
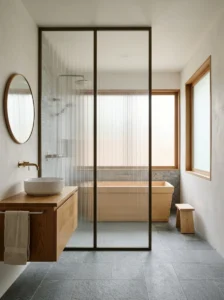
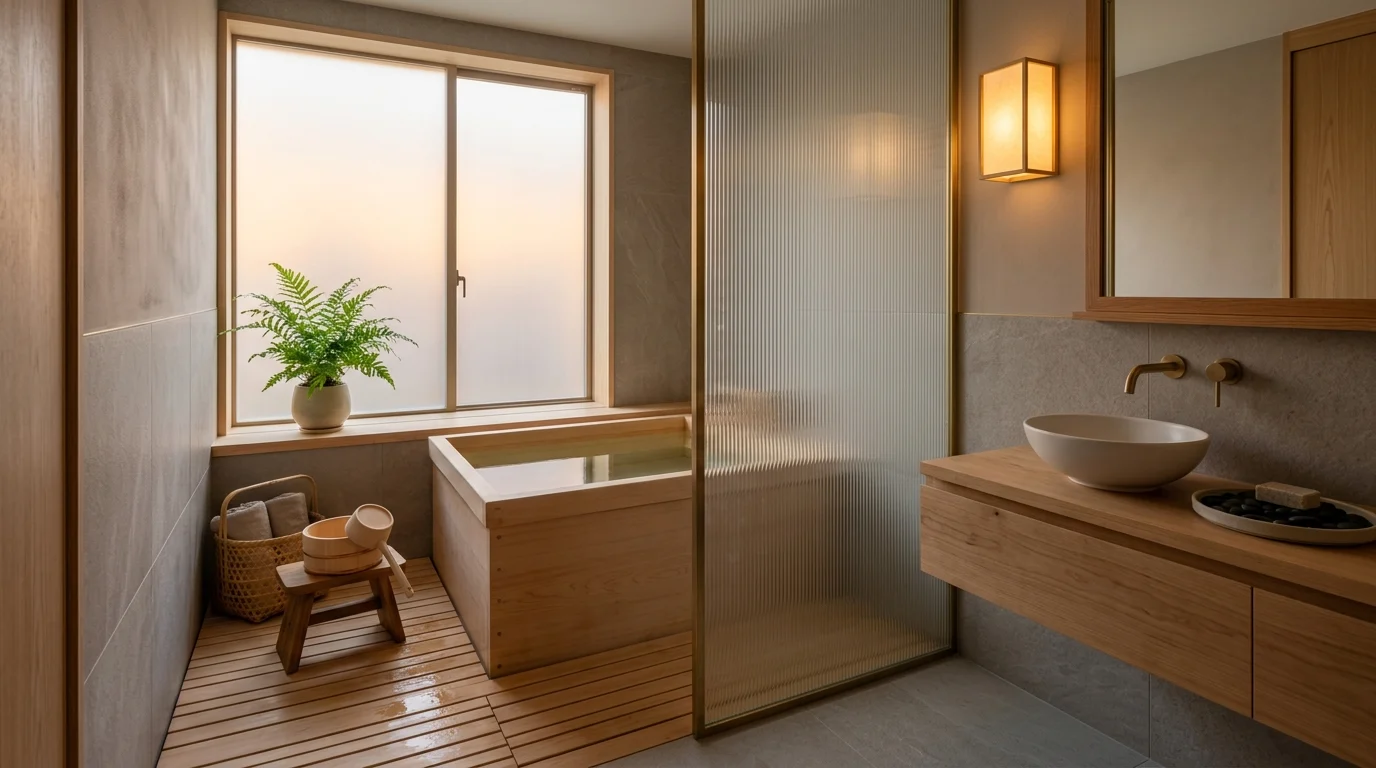
Traditional Japanese design often incorporates shoji-inspired screens, translucent paper panels that diffuse light while maintaining privacy, and we found a modern equivalent using frosted glass for our shower partition and a small window treatment. This approach lets natural light filter through the room without sacrificing privacy, achieving a soft, diffused quality of light that feels distinctly calmer than either fully transparent glass or opaque curtains that block light out entirely.
We specifically chose a subtly ribbed frosted glass rather than a completely smooth frosted finish, since the texture adds a bit more visual interest reminiscent of traditional shoji screening while still serving the same functional purpose of privacy and gentle light diffusion. This detail took a bit of extra searching to find, since most standard frosted glass options at local suppliers were either fully smooth or featured a more contemporary geometric pattern that didn’t quite match the softer, more organic look we were after. We eventually found a supplier specializing in Japanese-inspired building materials who carried the ribbed texture we wanted, and while it cost slightly more than a standard frosted panel, the resulting light quality in the room made the extra expense feel entirely justified once installed. Beyond the shower partition, we also applied a similar frosted film to our small bathroom window, replacing the heavier fabric curtain we’d used previously, which allowed considerably more daylight into the room throughout the day while still maintaining full privacy from the street outside. That extra daylight has made a noticeable difference in how the room feels during daytime use, reducing our reliance on artificial lighting except during evening soaks when we specifically want that dimmer, warmer glow instead, which has also modestly lowered our energy use throughout the year, a small but welcome bonus we hadn’t originally planned for.
8. Add Warm, Dimmable Lighting
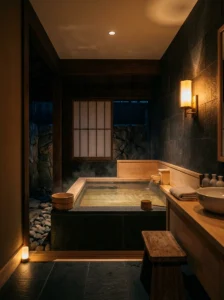
Harsh overhead lighting works directly against the calm, spa-like mood central to Japanese bathroom design, so we prioritized warm, dimmable lighting throughout our renovation. We installed a dimmer on our main overhead fixture and added a smaller wall sconce near the tub specifically for evening soaks, allowing us to dial the lighting down to a soft, low glow during actual bathing time rather than relying on bright, even illumination meant more for grooming tasks like shaving or applying makeup.
This flexibility has made a genuine difference in how different the room feels depending on the time of day and its intended use, bright and functional in the morning, soft and quiet in the evening, which mirrors the same kind of intentional, ritual-focused approach found in traditional Japanese bathing spaces. We chose bulbs in a warm 2700K color temperature throughout, avoiding the cooler, bluer light common in many standard bathroom fixtures, since that warmer tone consistently reads as more relaxing and less clinical no matter how bright or dim the dimmer is set, a detail that made a bigger difference than we initially expected once compared side by side. It’s a relatively small and affordable change compared to some of the larger structural elements on this list, but I’d genuinely rank it among the most impactful upgrades we made, given how directly lighting shapes the emotional tone of a room regardless of what materials or furniture surround it. We also added a small plug-in nightlight near the floor for late-night visits, set to an even dimmer, warmer glow than the main sconce, which has meant we never need to flip on brighter lighting in the middle of the night and disrupt the calm atmosphere we’ve worked to establish throughout the rest of the space, keeping even a quick nighttime trip to the bathroom from feeling jarring.
9. Choose Stone or Stone-Look Tile for the Wet Zone
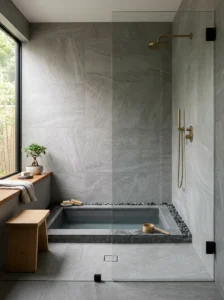
Natural stone, or a durable stone-look porcelain alternative, brings an organic, textured quality to the shower and tub surround that plain white tile simply doesn’t achieve. We used a soft gray stone-look tile with subtle natural variation across the surface, avoiding anything with a glossy, uniform finish that would have read as more conventionally modern than organically calming.
The slight texture and tonal variation in the tile has genuinely added depth to the wet zone, catching light differently throughout the day and giving the room a more layered, natural appearance than a flat, single-tone tile choice would have provided. We opted for the porcelain version rather than authentic natural stone specifically for maintenance reasons, since real stone in a shower requires regular sealing to prevent staining and water damage, while the porcelain alternative offers a nearly identical visual effect with significantly less ongoing upkeep. This was a practical tradeoff we were happy to make, since the visual difference between the two options is minimal once installed, but the difference in long-term maintenance effort is considerable, particularly for a busy household without much time to dedicate to specialized stone care routines. We did choose to use a small amount of genuine natural stone as an accent border around the tub’s edge, giving us a taste of the authentic material’s texture in a limited, more manageable area, while relying on the more practical porcelain option for the larger surfaces throughout the rest of the wet zone. This combination approach let us enjoy some of the tactile appeal of real stone without taking on the maintenance burden of sealing and caring for it across the entire shower and tub surround, giving us the best of both the authentic material and the more practical, low-maintenance option in one cohesive design.
10. Incorporate a Low Wooden Stool for Seated Washing
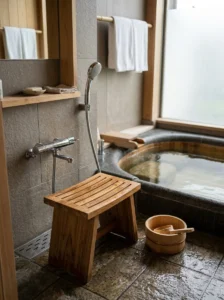
A small, low wooden stool, traditionally used for seated washing before entering the soaking tub, is both a functional and symbolic element of authentic Japanese bathing practice. We added a simple teak stool near our wet zone, and beyond its practical use for a more comfortable seated shower experience, it’s become a visual anchor that signals the room’s intentional design philosophy the moment you walk in.
This is a relatively inexpensive addition compared to some of the larger renovation elements on this list, making it one of the easiest starting points if you want to begin incorporating Japanese bathing principles into your space without committing to a full remodel right away. Beyond its aesthetic role, the stool has proven genuinely useful in practical terms as well, particularly for tasks like shaving or washing feet, where sitting rather than standing makes the whole process noticeably more comfortable and less precarious than balancing on one leg in a slippery shower. We chose a slatted design specifically to allow water to drain through rather than pool on the seat’s surface, which has helped it dry faster between uses and reduced any concern about lingering moisture leading to mold or mildew over time. The stool has also proven surprisingly versatile beyond its original bathing purpose, doubling as a small side table for a candle or a cup of tea during longer soaks, or simply as a spot to set folded clothes within easy reach while showering. For anyone considering this addition, I’d recommend choosing a stool with slightly rounded edges and a low overall height, both practical safety considerations and details that keep the piece feeling softer and more in line with the room’s overall calm aesthetic rather than introducing any harsh, angular lines, especially in a small space where every piece of furniture carries more visual weight than it might in a larger room.
11. Add Simple, Uncluttered Shelving
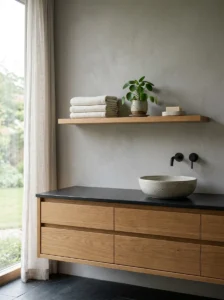
Minimalism is central to the calm, restrained feeling of Japanese design, and cluttered shelves work directly against that aesthetic. We replaced our previous open shelving, which had accumulated a fairly random assortment of products over the years, with a single simple wood shelf holding only a few carefully chosen items, folded towels, a small plant, a single ceramic soap dish.
This shift required a genuine decluttering effort beyond just the shelf itself, moving most of our everyday products into a closed cabinet out of sight, but the visual calm that resulted has been one of the more impactful, low-cost changes in the entire renovation. I found it helpful to set a firm rule for myself when styling the shelf, no more than three or four visible items at any time, which forced me to be genuinely selective rather than simply relocating clutter from one visible surface to another. This same principle extended to our vanity counter as well, where we now keep only a couple of items out at any given time, everything else tucked into drawers, reinforcing the same sense of restraint throughout the entire room rather than limiting it to just the one shelf. Maintaining this level of restraint has required an ongoing habit rather than a one-time cleanup, since it’s easy for new products or gifted toiletries to slowly creep back onto visible surfaces if I’m not periodically reassessing what’s actually out on display. I’ve found that doing a quick five-minute declutter pass every couple of weeks, simply putting away anything that’s accumulated on the counter or shelf since the last check, has been enough to maintain the calm, curated look we worked hard to establish during the initial renovation, without it ever feeling like a burdensome chore added to an already busy schedule.
12. Introduce a Small Indoor Plant for Natural Life
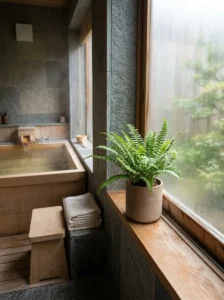
A single, well-chosen plant, often something simple like a small fern or a bamboo stalk, adds a touch of living, natural texture that complements the wood, stone, and muted color palette already present in a Japanese-inspired bathroom. We added a small potted fern on our windowsill, choosing a variety known to tolerate bathroom humidity well, and it’s a modest addition that nonetheless adds genuine life and softness to the space.
I’d recommend choosing just one or two plants rather than filling the room with greenery, since restraint remains a core principle throughout this design style, and a single well-placed plant tends to read as more intentional than a larger, more scattered collection. We rotate the fern out every so often when it needs a break from the bathroom’s humidity to recover in a brighter spot elsewhere in the house, swapping in a small lucky bamboo stalk in its place during that time, which has worked well as a low-maintenance backup option that tolerates the bathroom’s conditions even better than the fern does over extended periods. This small rotation habit has kept greenery consistently present in the room without either plant ever looking worn out or neglected. I’d also recommend paying attention to your bathroom’s actual light levels before choosing a plant variety, since even humidity-tolerant plants still need some access to natural or artificial light to thrive, and a bathroom with only a small, frosted window may need a more shade-tolerant option than one with a larger, clearer window offering more direct daylight throughout the day. Taking the time to match the plant to your specific room’s conditions, rather than choosing based purely on appearance, has made a real difference in how long our greenery has actually lasted compared to a couple of earlier attempts that didn’t survive more than a few months in the wrong spot.
13. Play Subtle Ambient Sound or Water Features
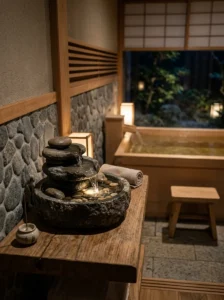
Some homeowners take the spa-like experience a step further by incorporating a small tabletop water fountain or playing soft ambient sound during baths, echoing the gentle water sounds often present in traditional Japanese bathing spaces. We added a small battery-powered tabletop fountain near our tub, and the subtle trickling sound has become a genuinely calming addition to our evening soaking routine, masking household noise from elsewhere and reinforcing the sense that this time is meant purely for relaxation.
This is an entirely optional addition and by no means necessary to achieve the overall aesthetic, but for anyone wanting to push the sensory experience further beyond the visual design elements alone, it’s a low-cost, easily reversible way to experiment with adding another calming layer to the space. We chose a battery-operated model specifically to avoid running an additional electrical outlet near the tub, which simplified installation considerably and meant we could reposition the fountain freely if we ever wanted to rearrange the room’s layout. On evenings when even the gentle fountain sound feels like too much, we simply turn it off, since part of the appeal of this addition is how easily it can be adjusted to match whatever mood the moment calls for, rather than committing us to a fixed, unchangeable soundscape every time we use the room. For anyone hesitant to invest in a physical fountain, a simple alternative worth trying first is a phone or small speaker playing a recording of gentle water sounds or soft ambient music during a soak, which costs nothing beyond what you likely already own and lets you test whether the added sensory layer genuinely enhances your experience before committing to a permanent fixture in the room, an approach we actually used ourselves for several weeks before eventually deciding the physical fountain was worth the investment.
Mistakes I Made Along the Way
- Choosing a soaking tub without properly considering our water heater capacity – Our first attempt at a deep soak left us running out of hot water partway through, which required upgrading our water heater setup before the tub could function as intended.
- Overcrowding shelves before committing to the minimalist approach – I initially kept too many everyday products visible, which undercut the calm aesthetic until I moved most items into closed storage.
- Choosing glossy tile before switching to a more textured, matte stone-look option – My first tile sample looked fine in isolation but read as too conventionally modern once installed, working against the organic, textured look I was ultimately going for.
- Underestimating how much lighting temperature mattered – I didn’t initially budget for a dimmer switch, and the harsh overhead lighting undermined much of the calming effect the other design choices had worked to create.
Frequently Asked Questions
Do I need an authentic imported Japanese soaking tub to achieve this look? No, many manufacturers offer deep soaking tubs inspired by traditional Japanese design at a range of price points and materials, including more affordable acrylic options that still capture the deeper, more enveloping soaking experience.
Is a wet room layout necessary for a Japanese-inspired bathroom? While a fully separated wet and dry zone is authentic to traditional design, smaller-scale changes like a glass shower partition or a slightly raised vanity area can achieve a similar effect without requiring a complete layout overhaul.
What’s the most affordable way to start incorporating this style? Adding warm wood accents, a low stool, a bath mat, decluttering shelving, and switching to warmer, dimmable lighting are all relatively low-cost changes that meaningfully shift a bathroom’s mood toward this calmer aesthetic.
Does this design style work well in small bathrooms? Yes, in fact many of the core principles, minimal clutter, a compact deep soaking tub, natural materials, translate particularly well to smaller spaces, since the emphasis on restraint and intentional design tends to suit tighter square footage naturally.
Final Thoughts
Looking back at that trip to Japan and the quiet, deliberate bathing ritual that inspired this whole renovation, I’m genuinely glad we took the time to understand the underlying philosophy rather than just borrowing a few surface-level aesthetic details. A Japanese-inspired bathroom isn’t really about a specific look, it’s about creating a space that treats bathing as a genuine ritual of rest and restoration rather than a purely functional task, and once that mindset shapes your design choices, even a modest bathroom can feel like a true spa-like retreat.